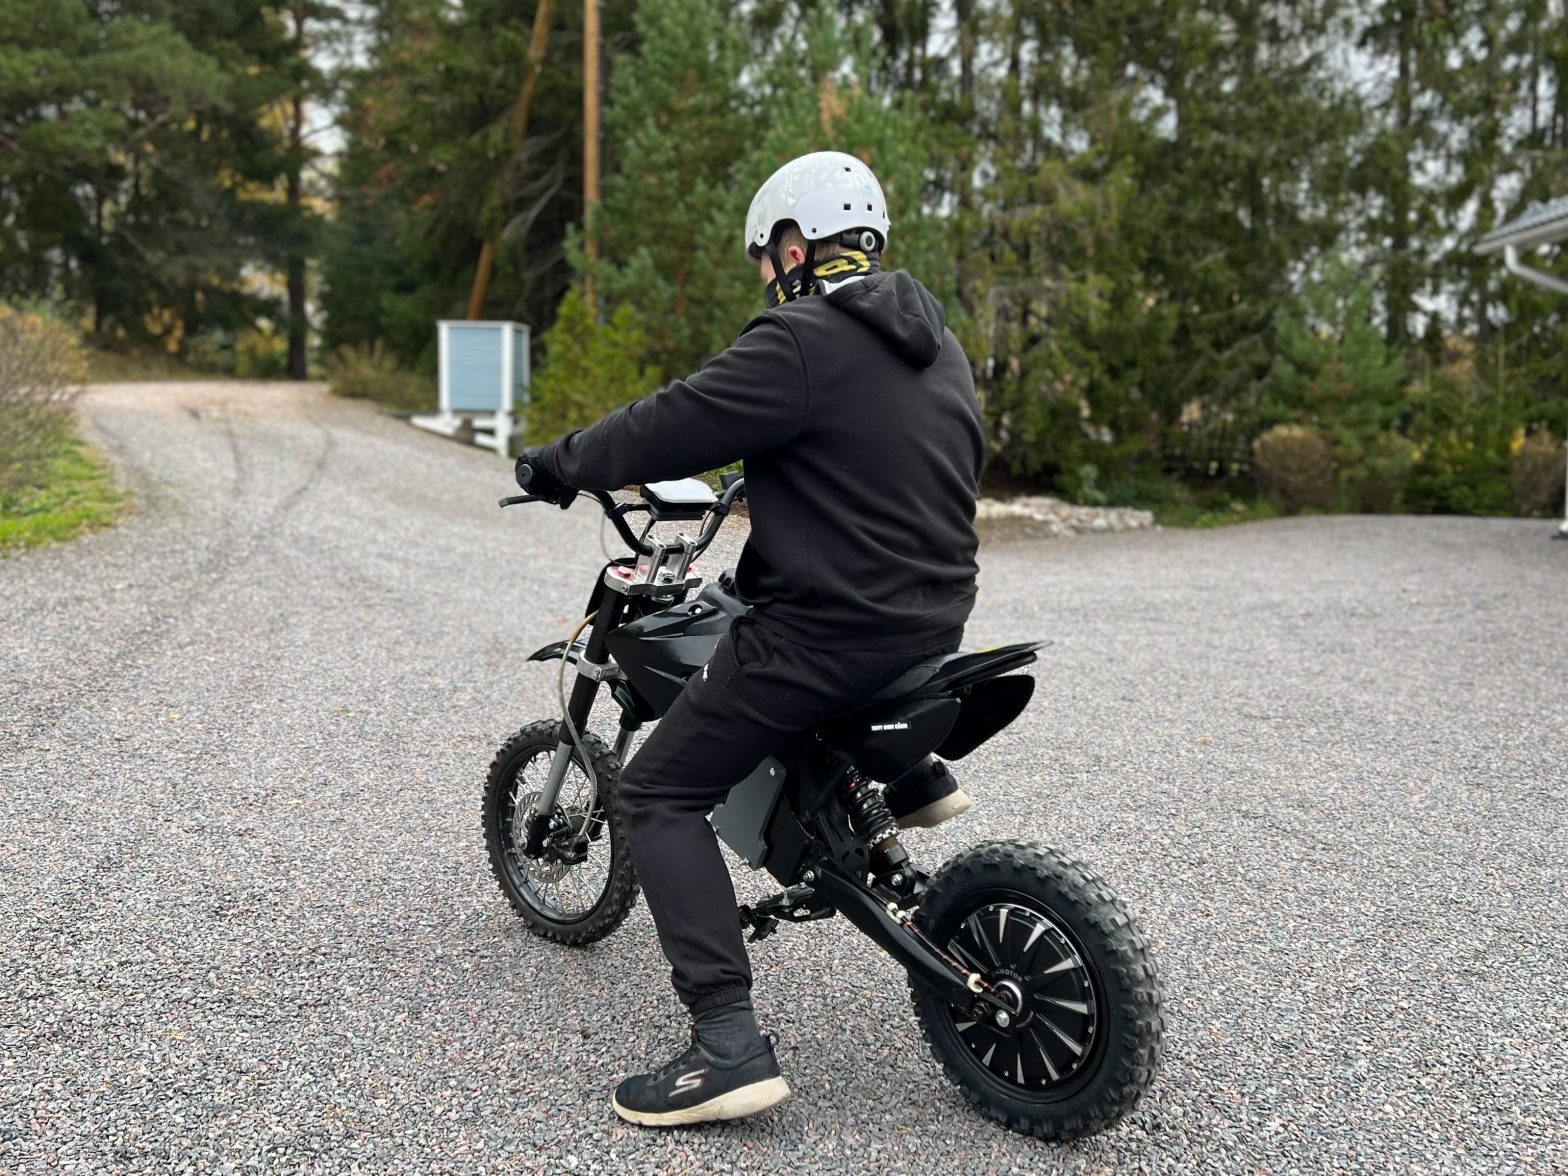
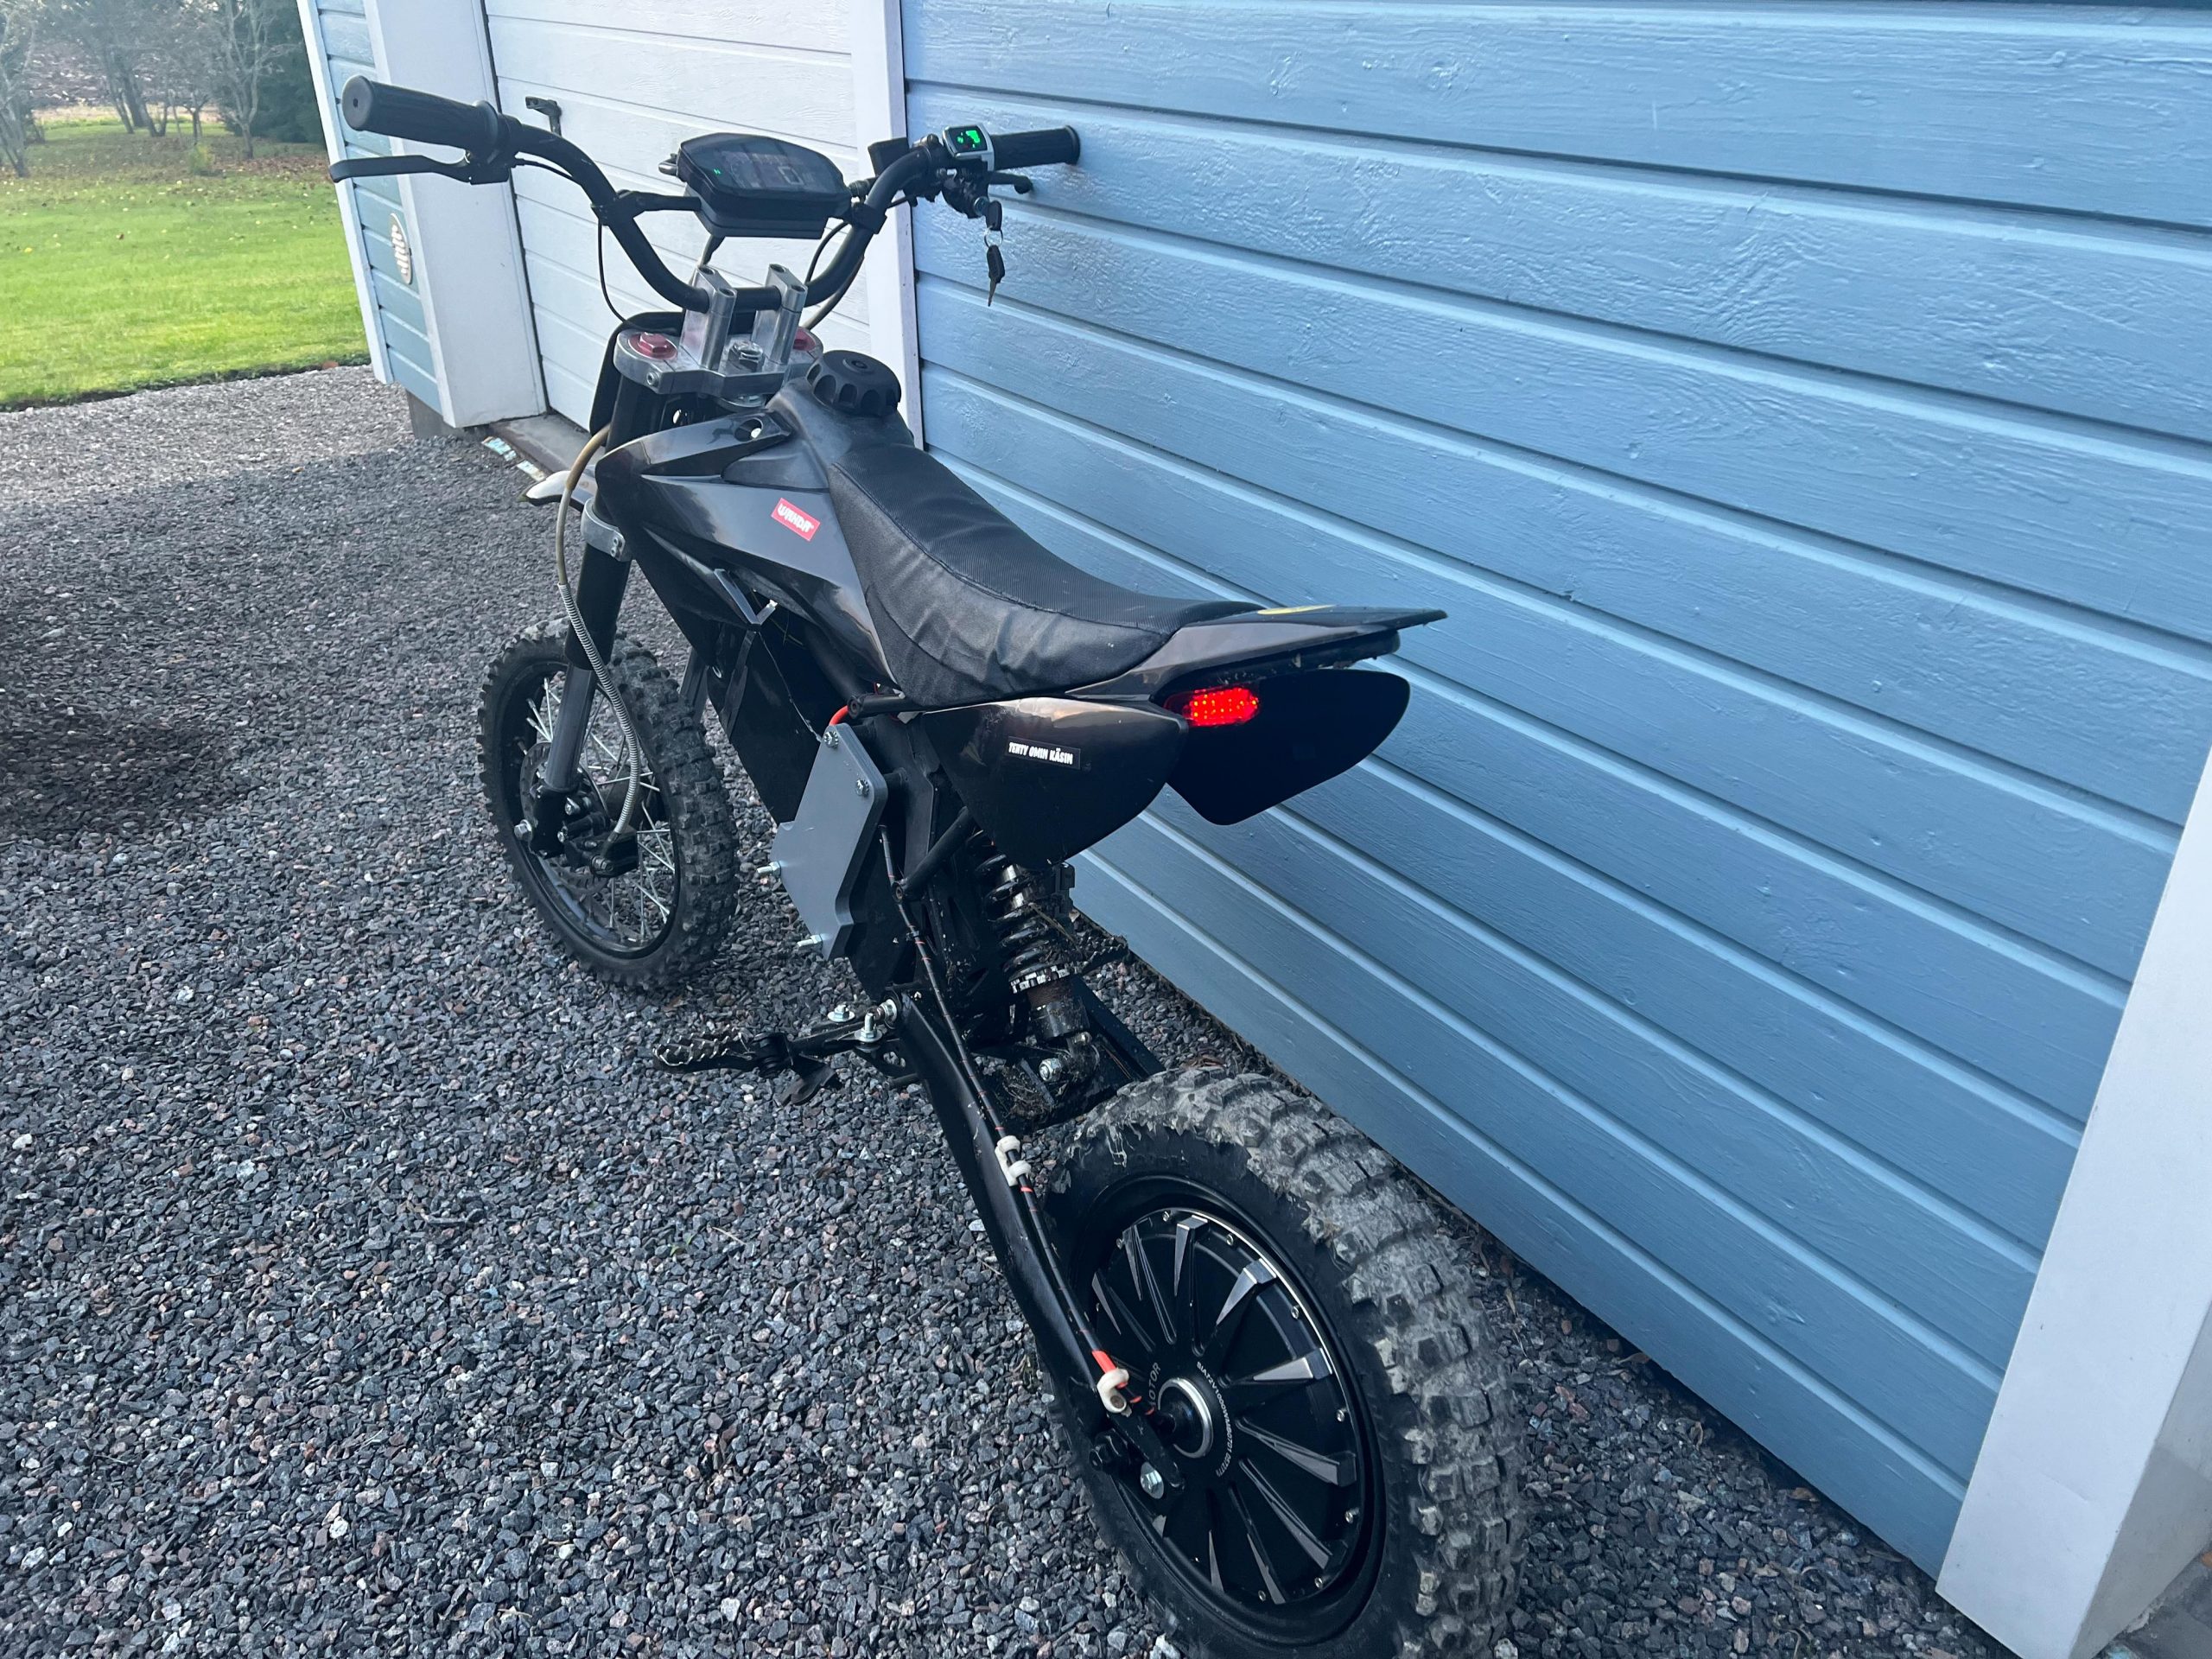
- Off-road capable pit-bike suitable for kids and adults
- 1000 W and 110 Nm
- 30 km+ range
- <1200 €
I was commissioned to build an electric bike for a 13-year-old to use both on and off-road. The requirements were ease of use, minimal maintenance and some off-road capability. For the bike frame I chose my usual, a Chinese 125cc pit bike.
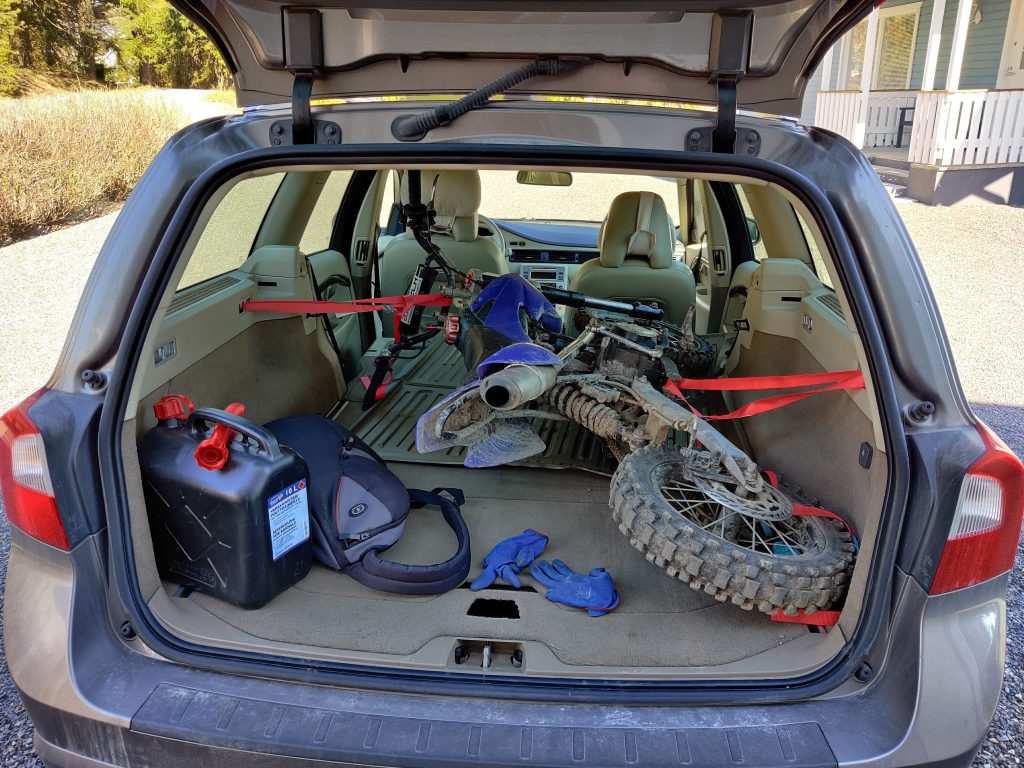
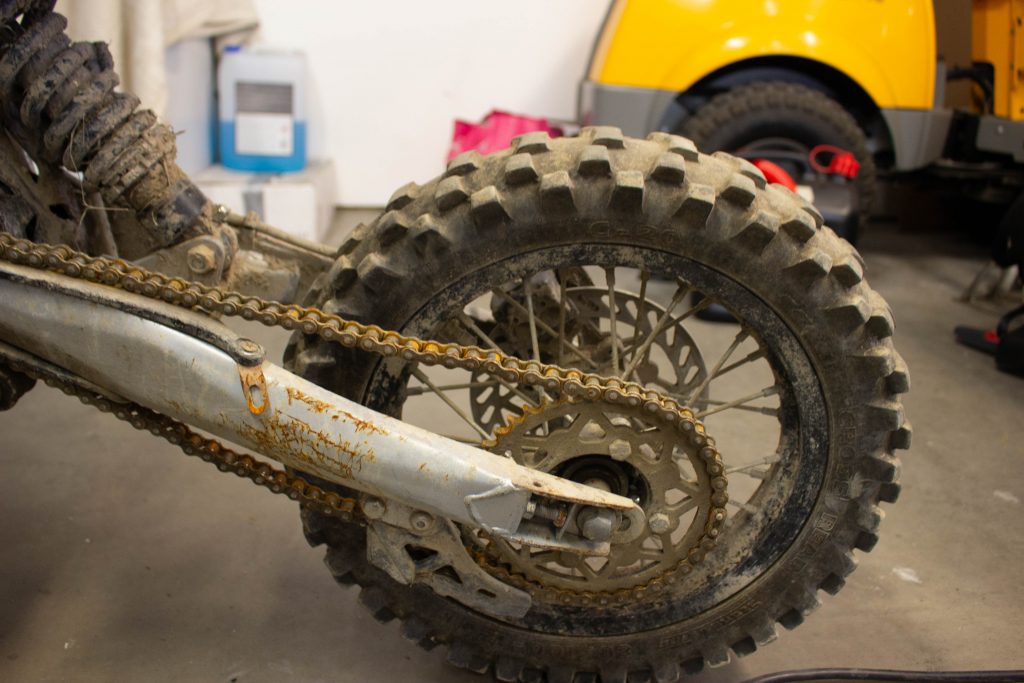


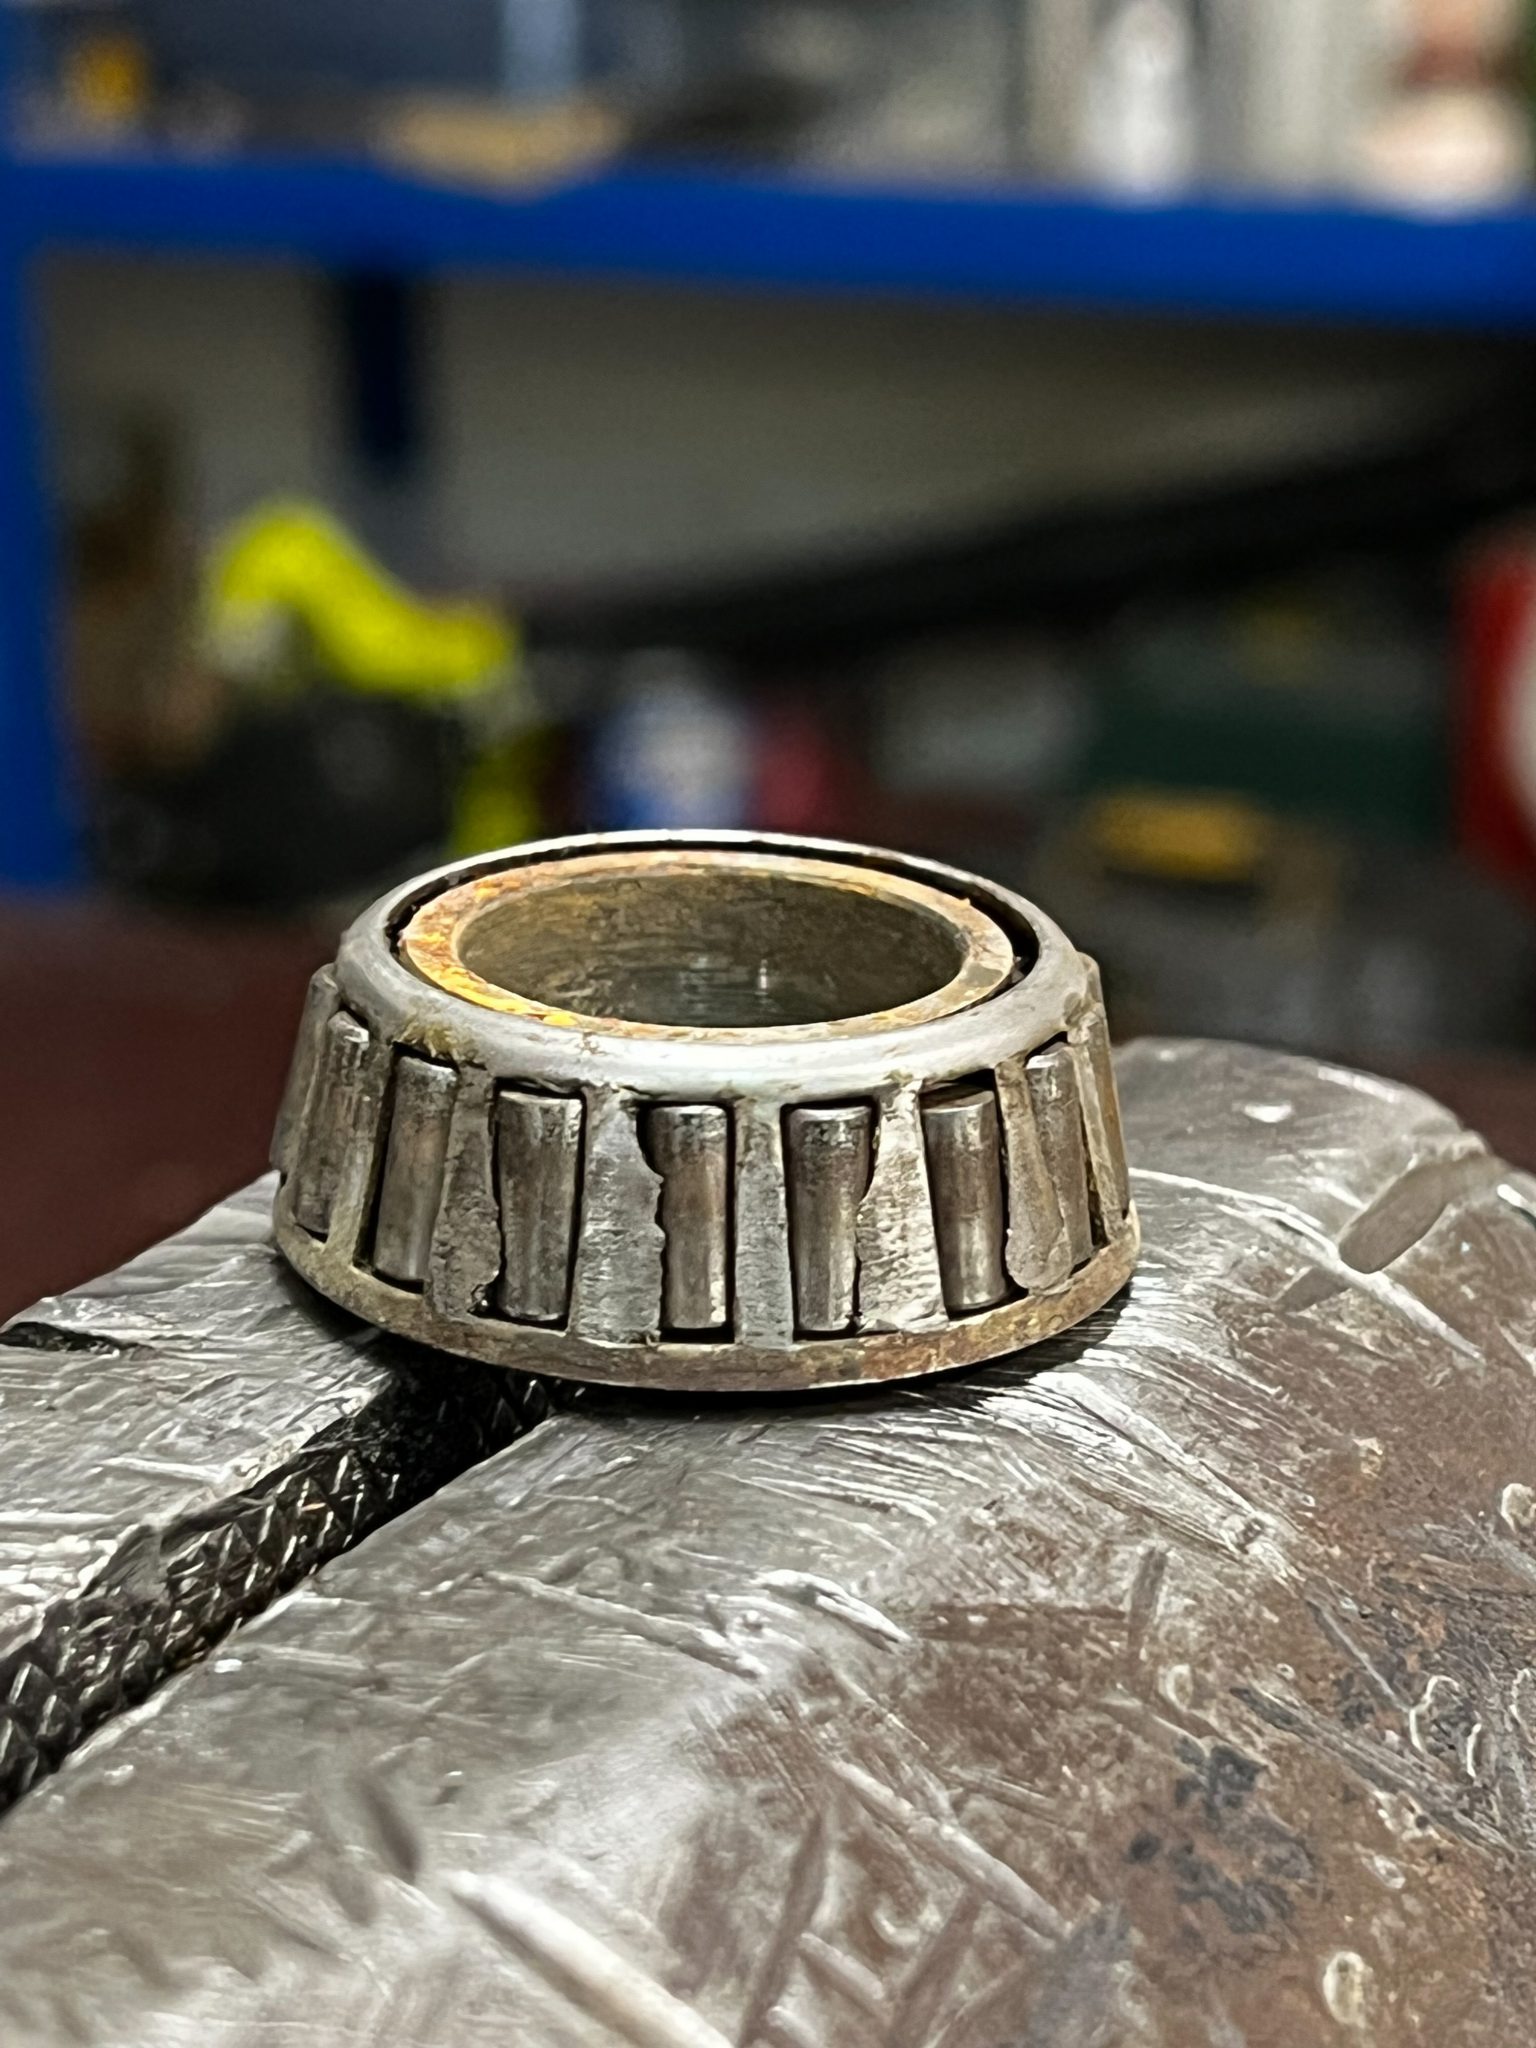
I got the bike in running condition but it hadn’t seen any service in years. The steering/head bearings were so worn they barely moved in certain spots. All the fairings were very faded and starting to crack too.
Plenty of work went into completely disassembling the bike frame and replacing all worn bushings and bearings. I also painted any rusted or otherwise worn parts

Assembly
Fun fact: 72 V from a lithium battery is enough to get your hands twitchy when holding the pack uninsulated!”
-me, after learning the hard way
For the components I ended up picking the following;
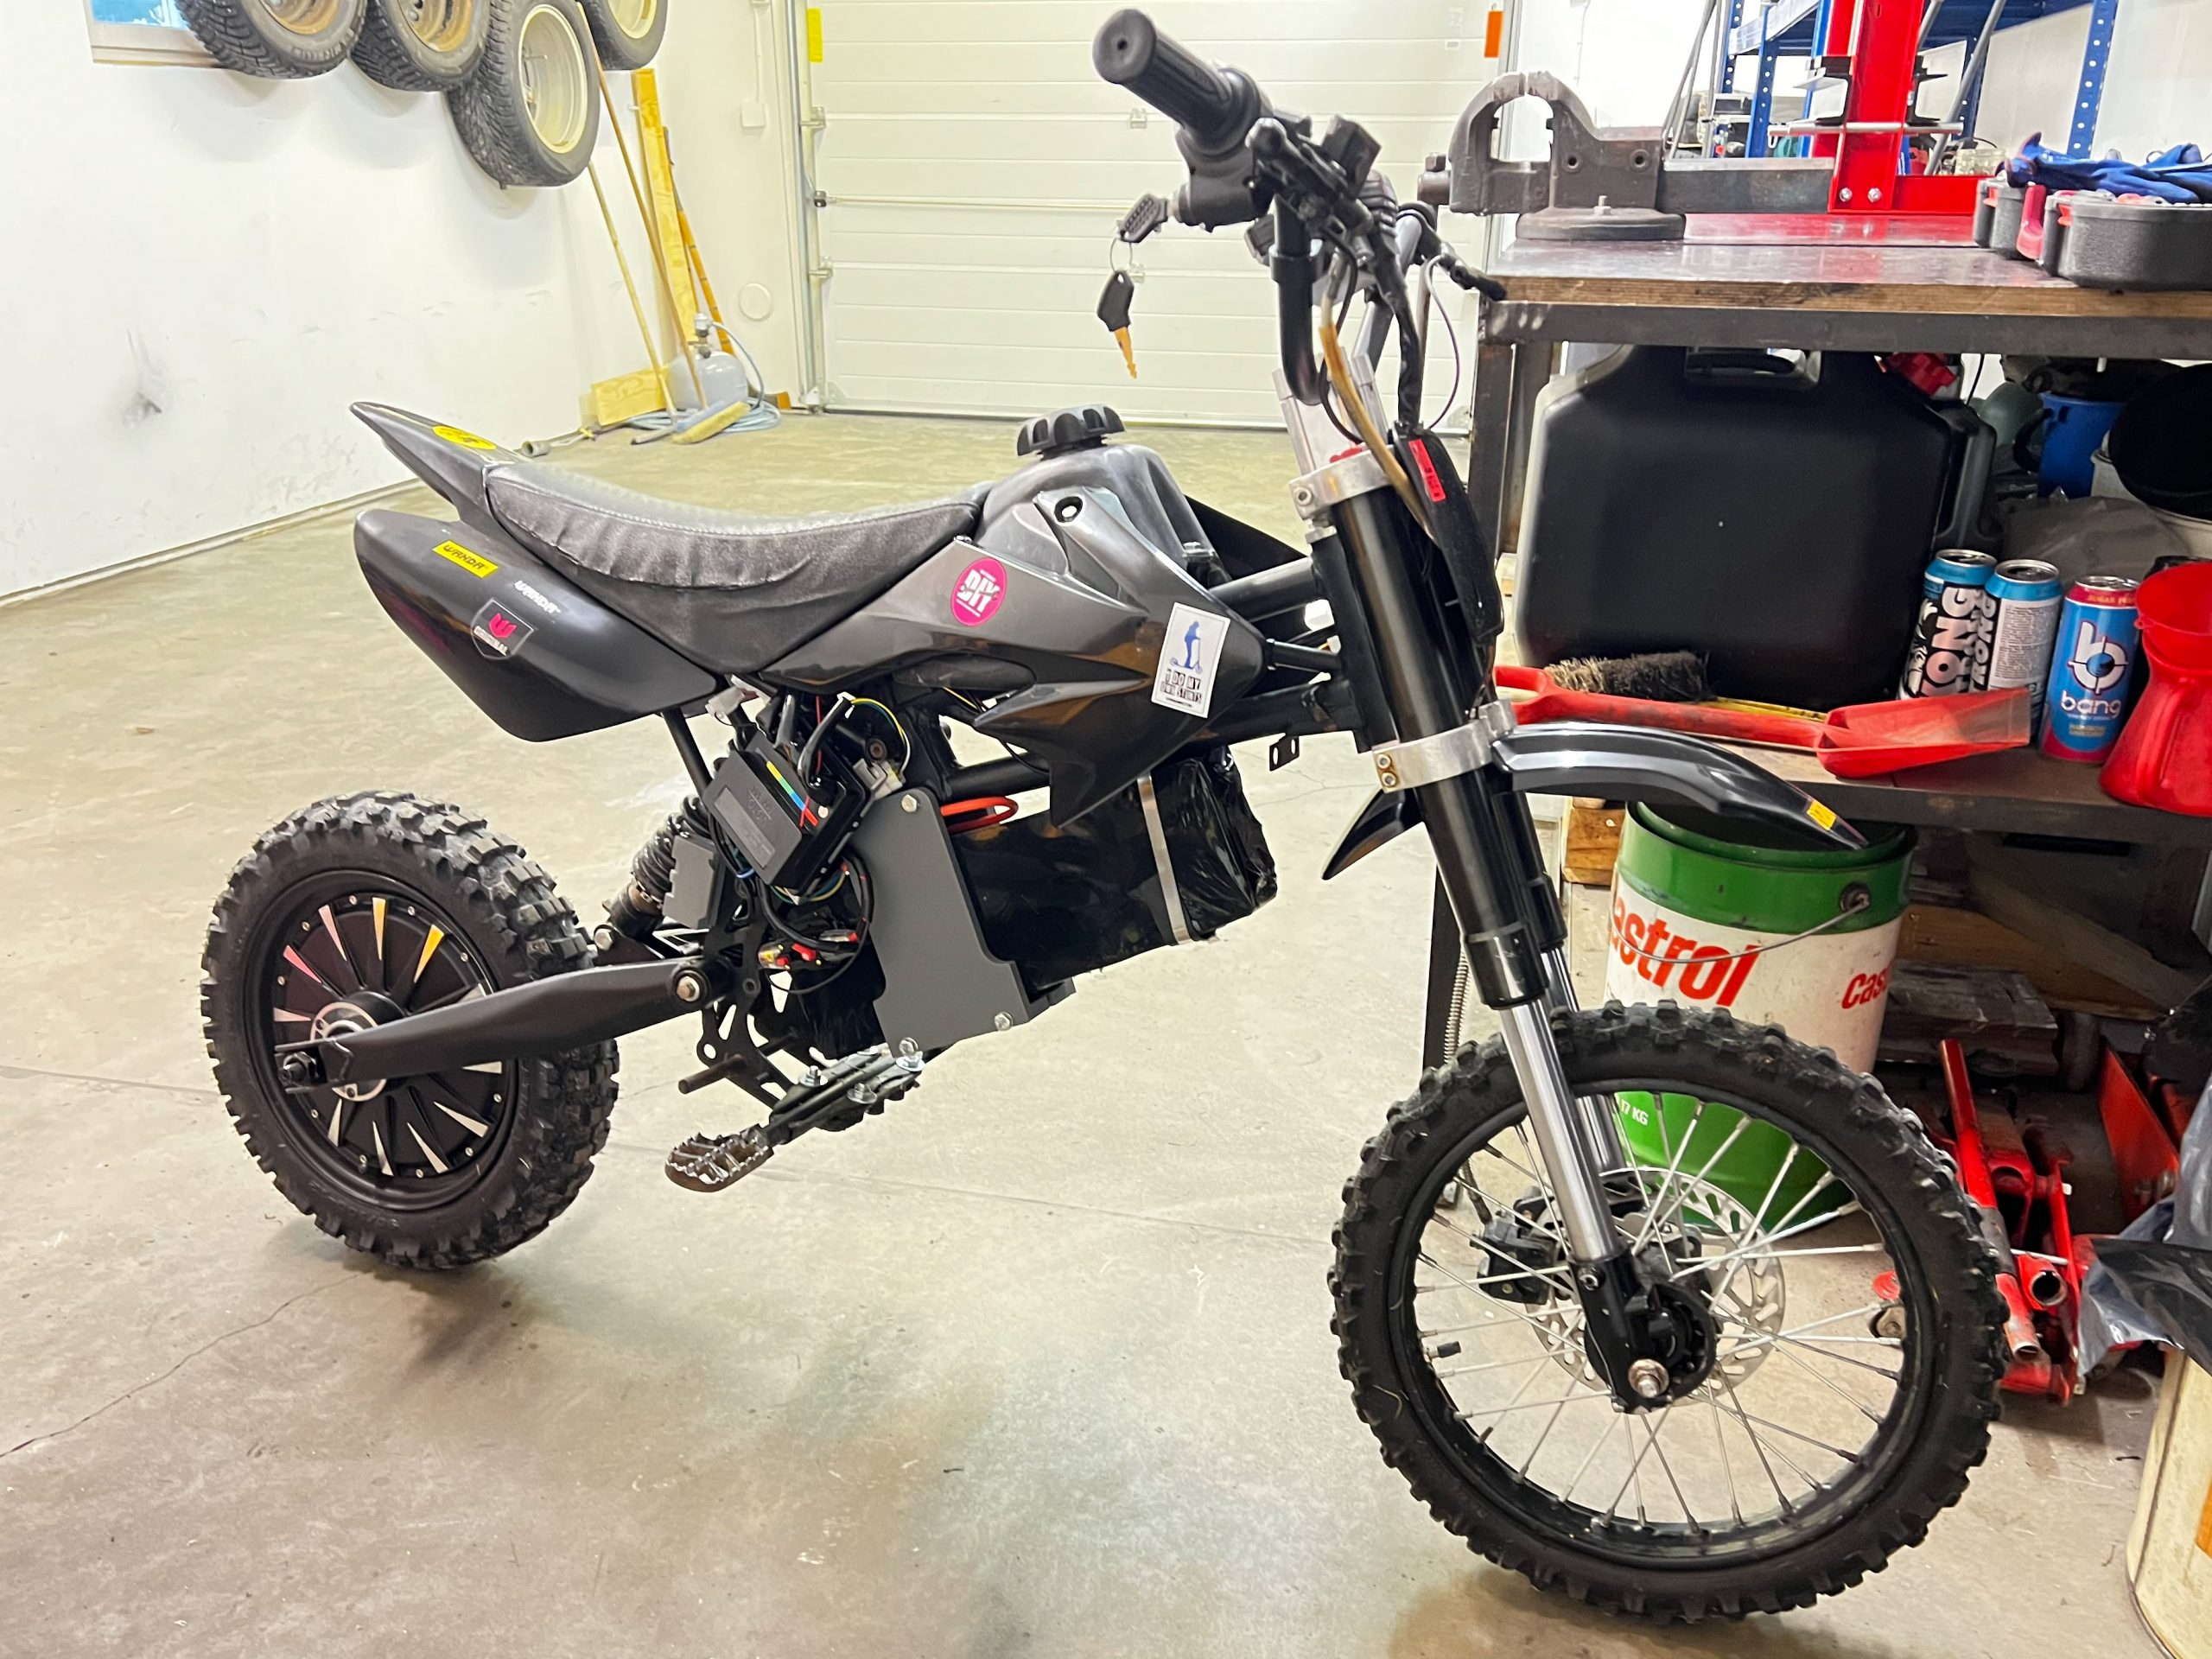
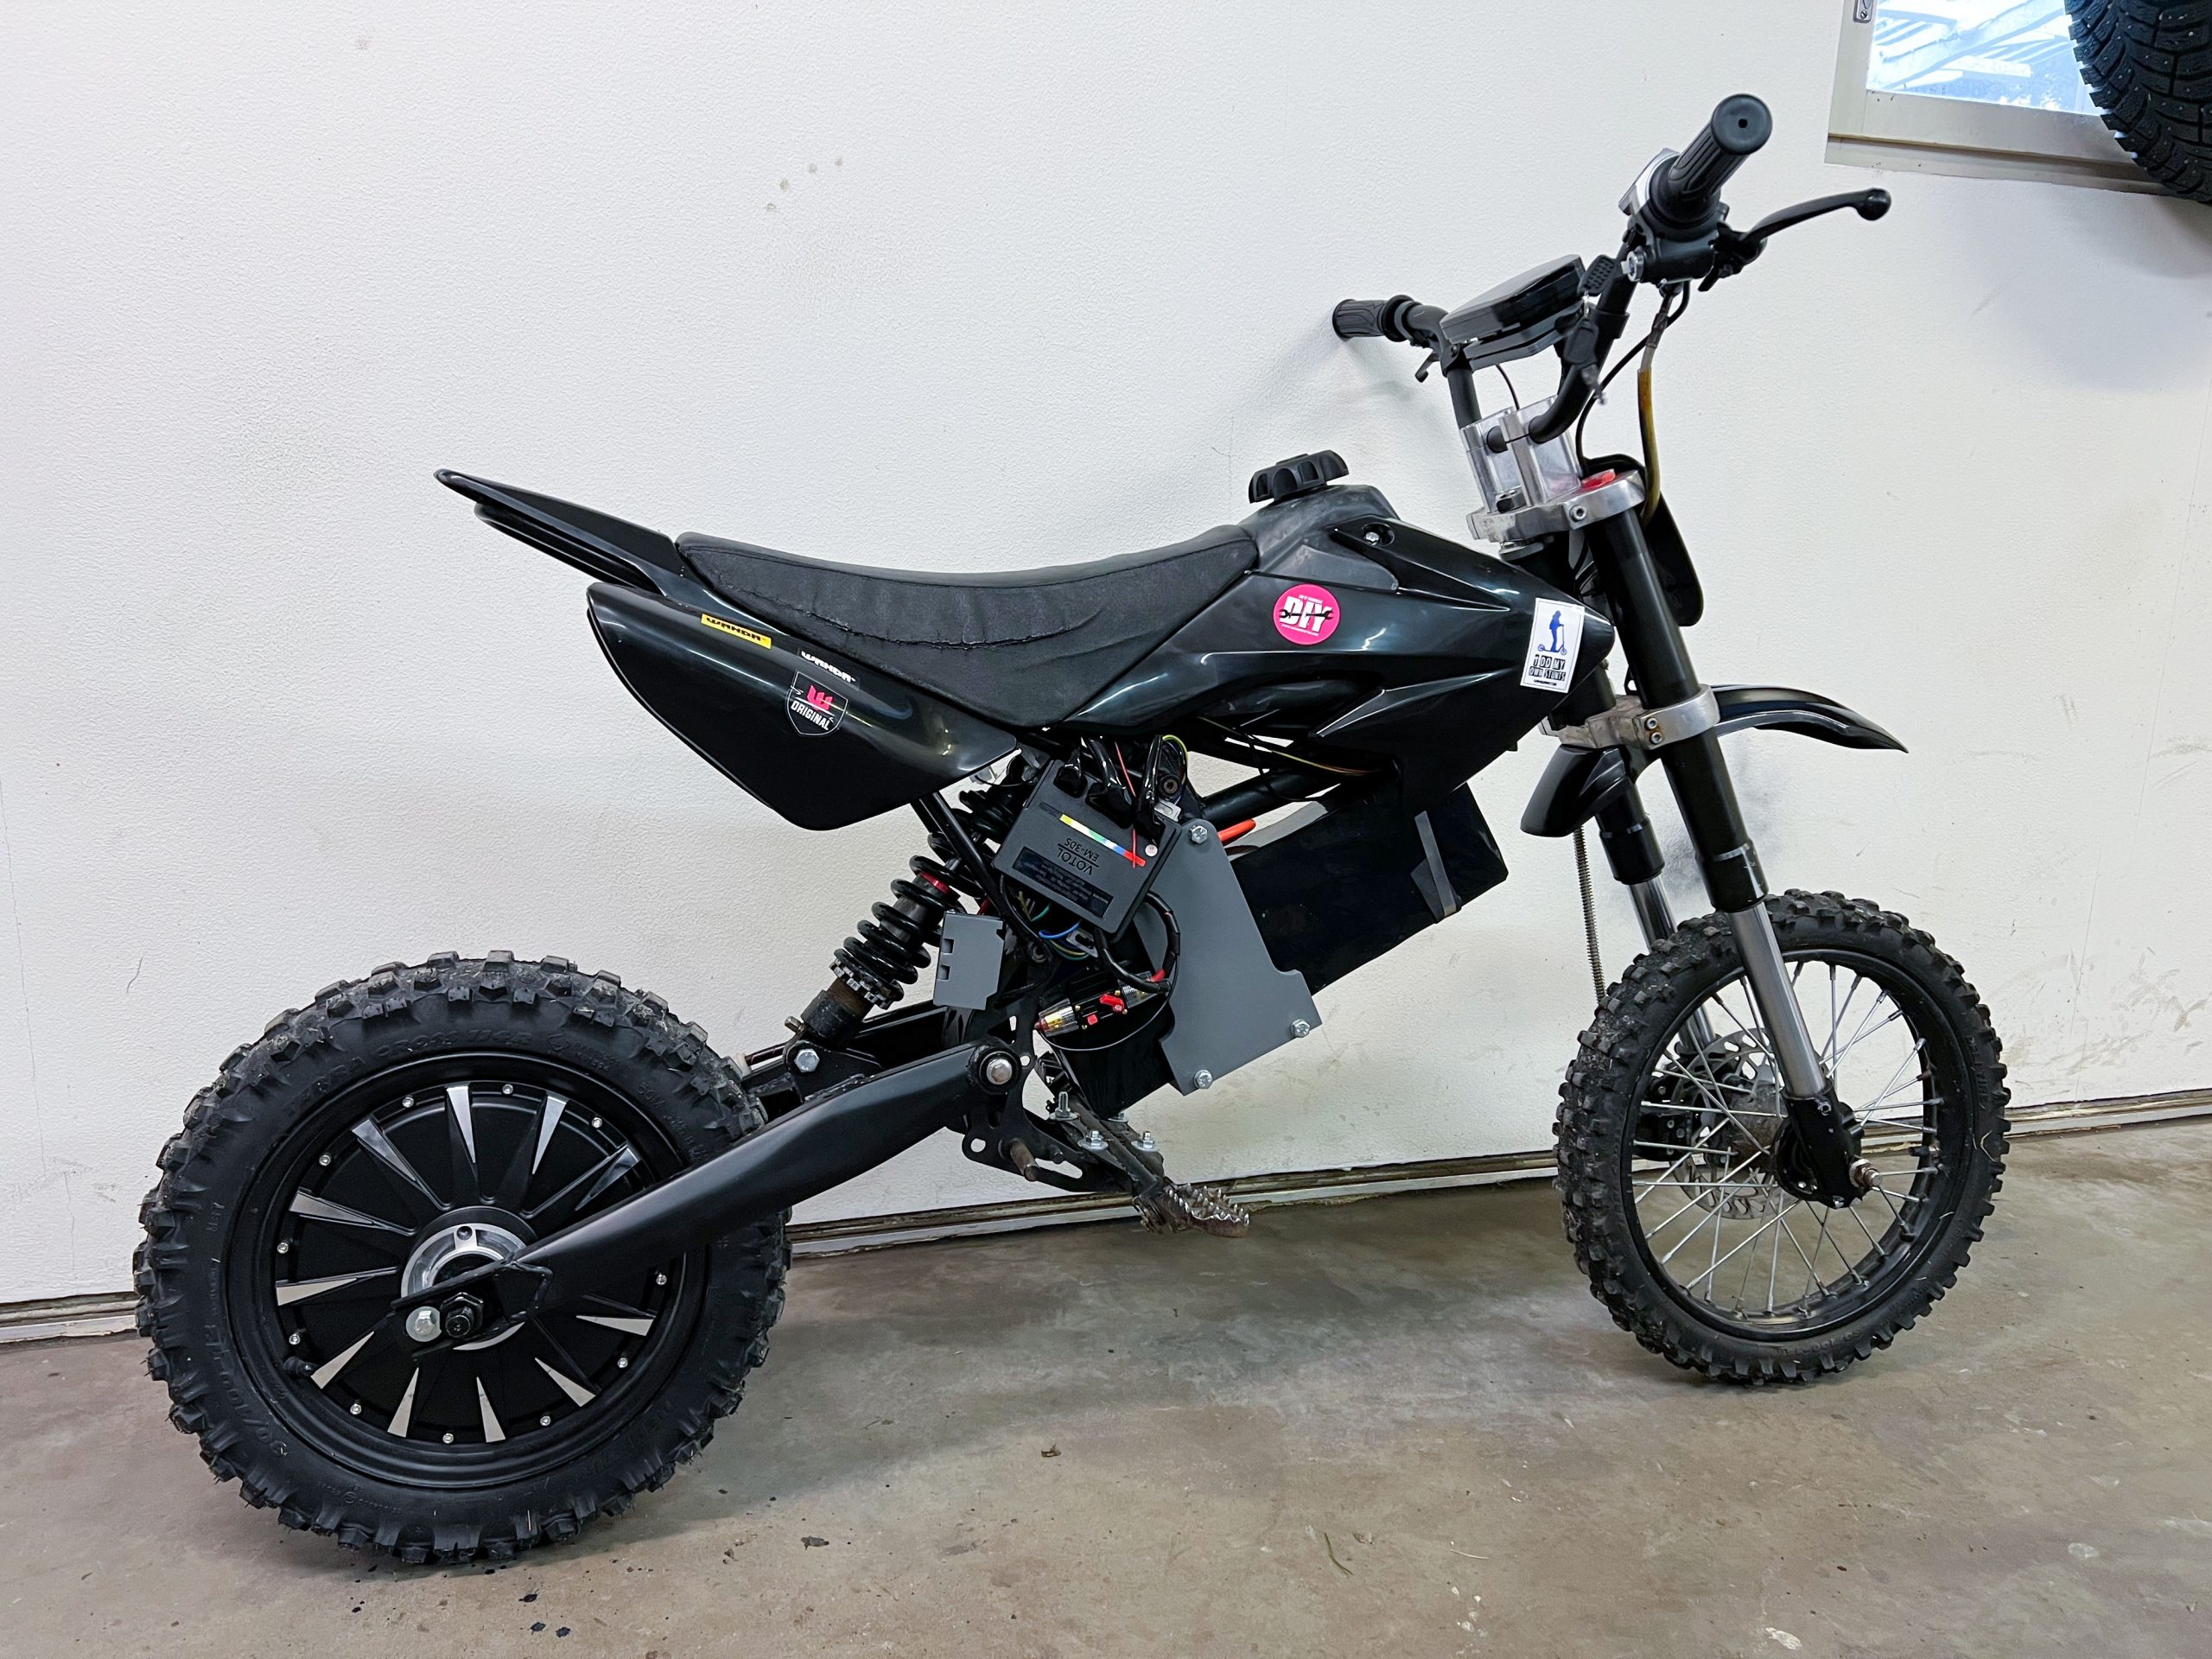
Drivetrain: SiaEcosys 260 12″ 1000W 72V hub motor, Votol EM30s controller, DKD speedometer and display.
Battery: 72V 15Ah lithium-ion built using LiitoKala HG2 cells in 20S5P arrangement and a Daly 40A BMS.
I chose a hub motor for its practically zero need for service. The battery specs were set by planning for roughly one hour runtime and this setup should accomplish it well, as 72V*15Ah = 1080Wh and in worst case the motor will draw continuous 1000W.
I paired the battery with a 5A (420W) charger to get the charge time to reasonable 3 hours from completely empty.
Battery
I decided building my own custom battery pack was the most cost effective route as the tools would pay for themselves with the first pack done compared to buying a custom made battery. I got a Sunkko S709A spot welder, 0,5kg of .15mm x 8mm pure nickel strip, 18650 spacers, Daly BMS with separate charge port and of course the cells – LiitoKala HG2 3000mAh. After receiving them, I verified the cells had real capacity of 2950-3000mAh.
Assembly of the battery was relatively easy was done in couple of afternoons. Fun fact: 72 V from a lithium battery is enough to get your hands twitchy when holding the pack uninsulated! After welding the battery and bms together, I covered all the sides of the pack with thick tape, 1mm polycarbonate sheet, some foam for cushioning and finally a large shrink wrap. I also attached a 40A fuse to the positive output lead.


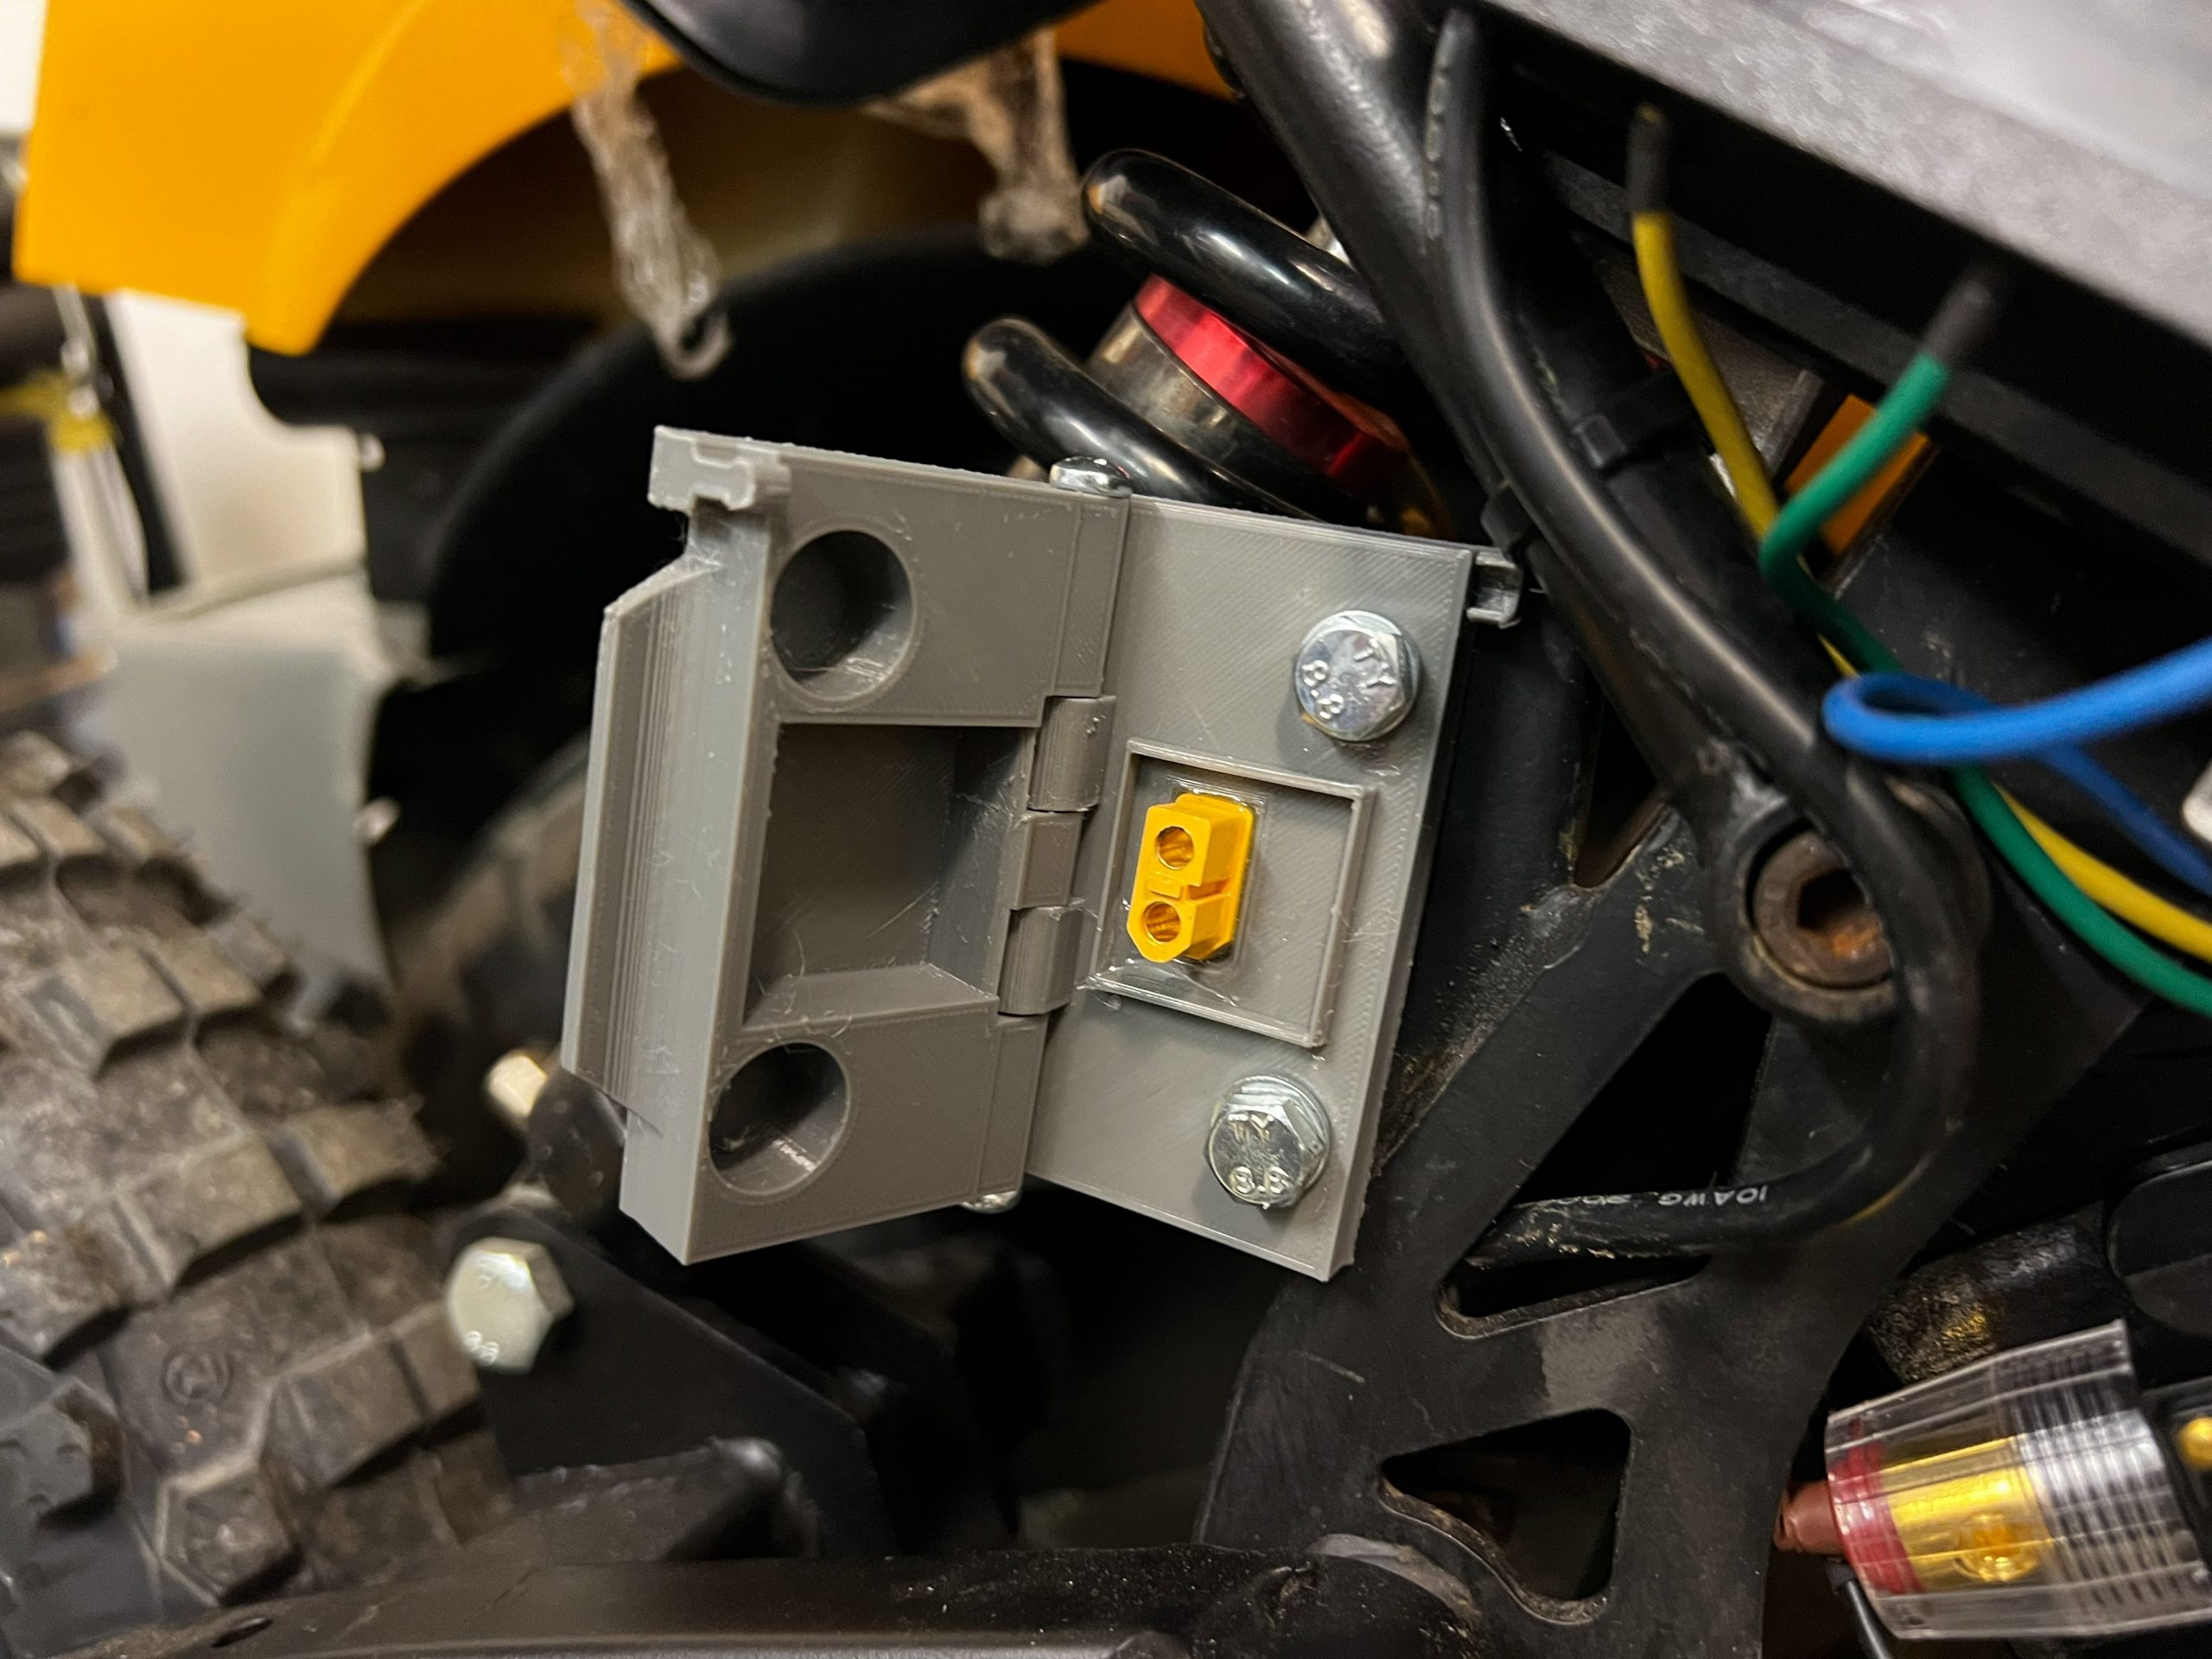
Continuing the theme of ease of use I gave the bike a separate charge port with XT60 plug. This way there is no need to unplug the battery for charging. Housing for the plug was 3D-printed from PETG and the plug glued in using strong epoxy.
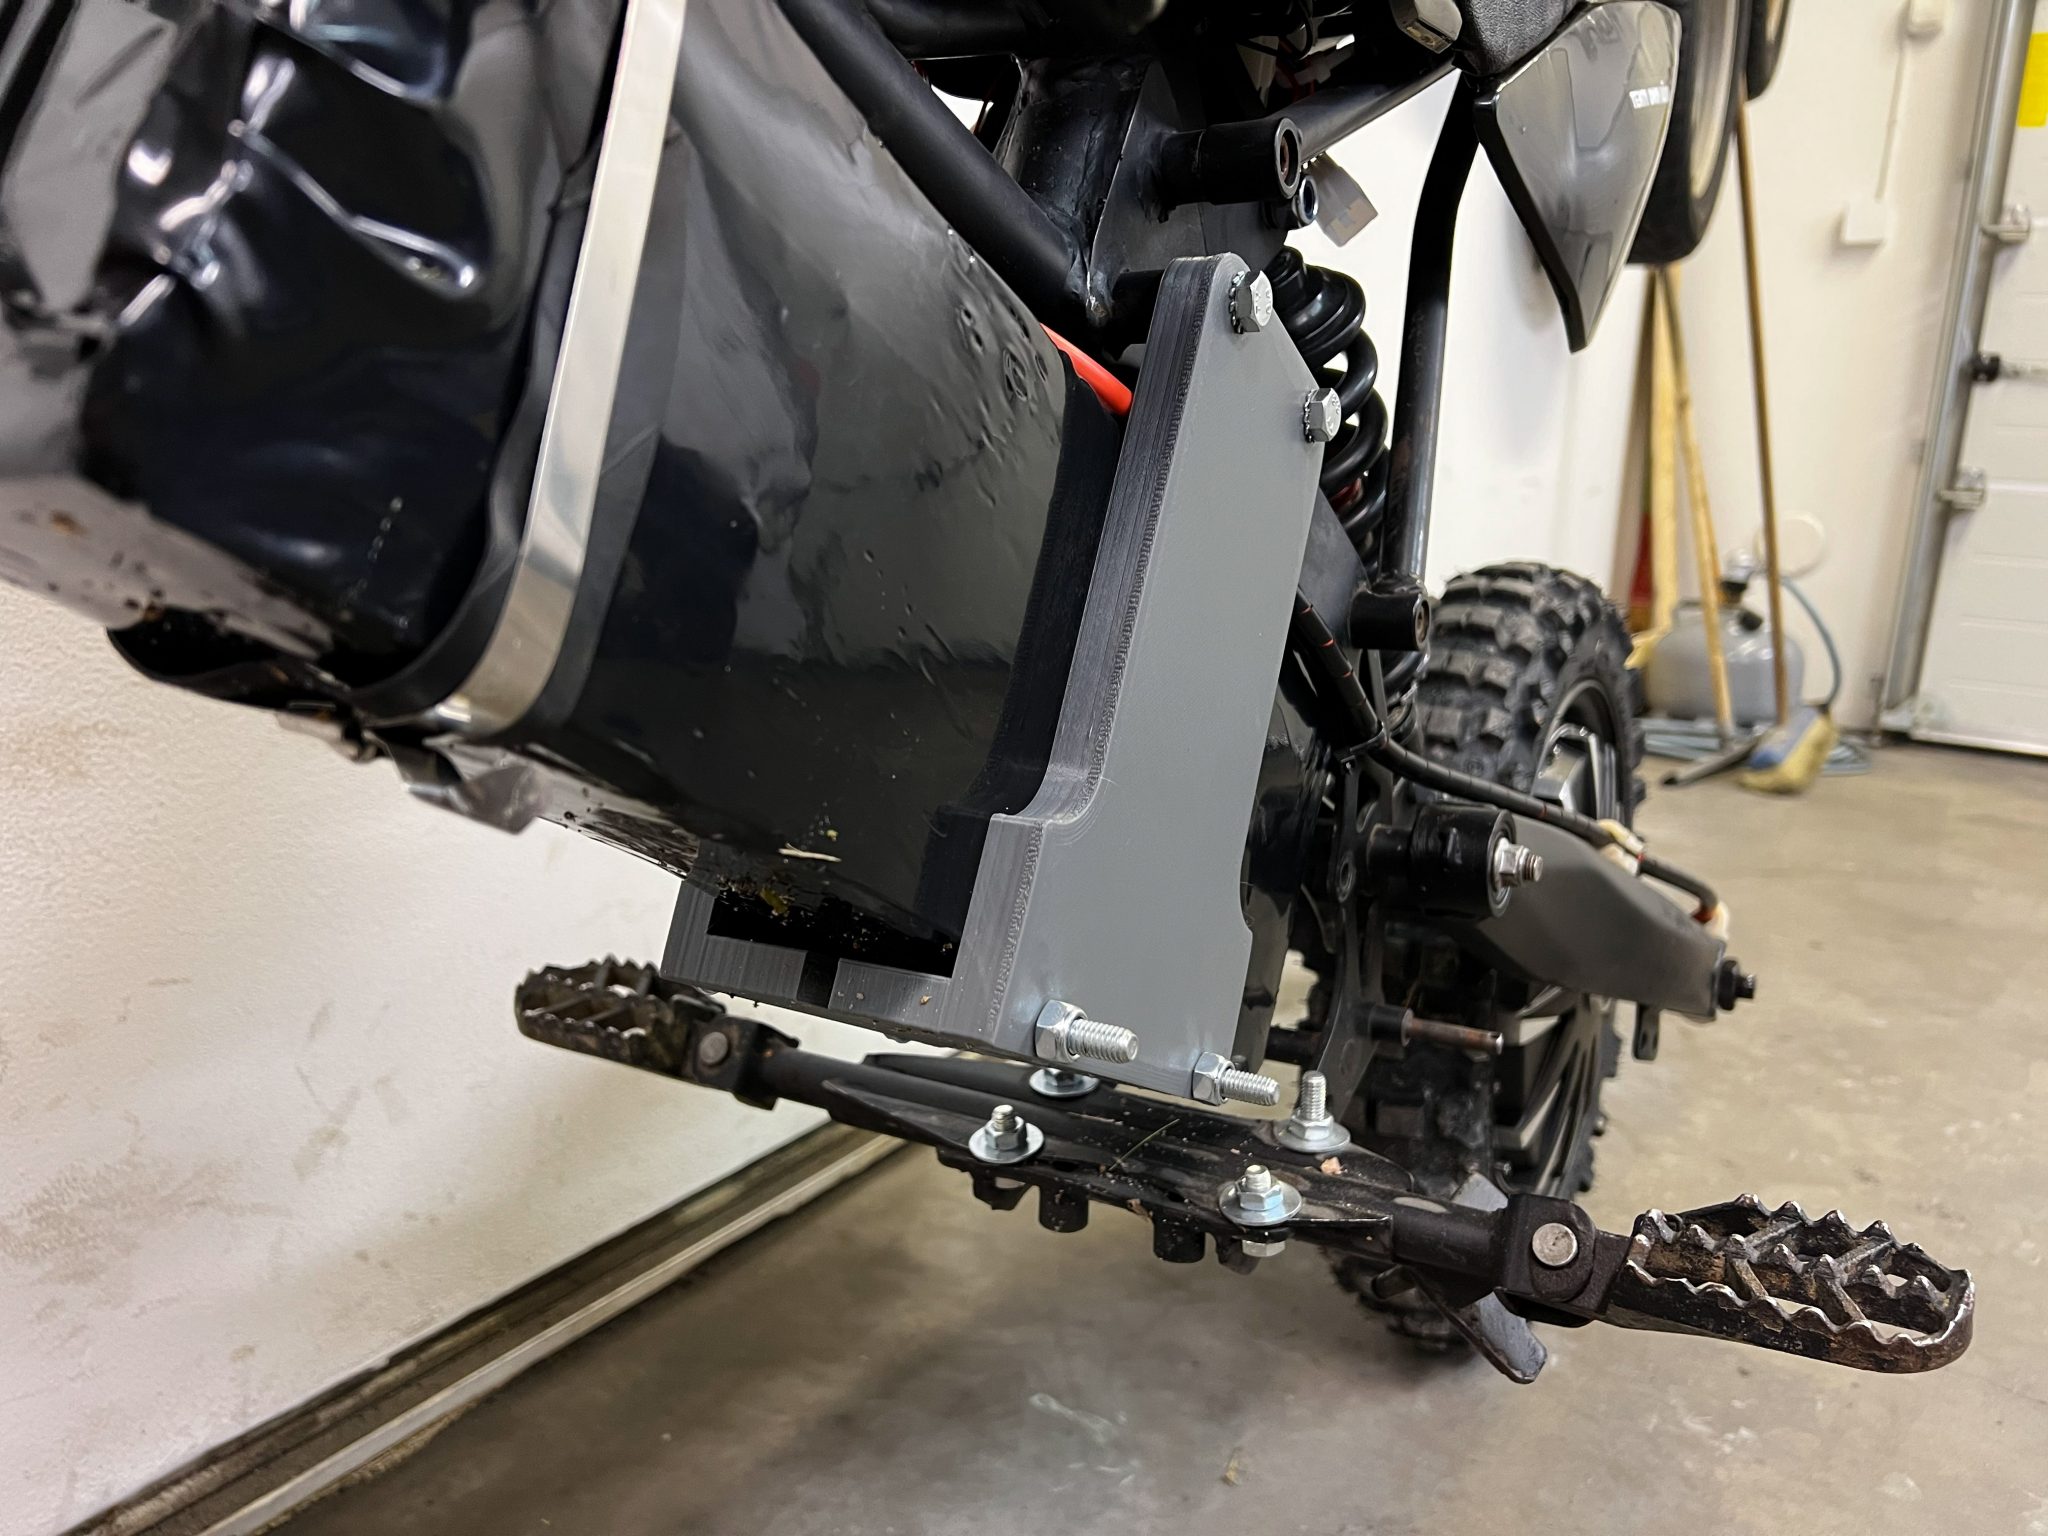
I also 3D-printed a two-piece mount for the battery, strengthened with a pair of M8 through-bolts. Additionally the battery pack is supported with a stainless steel band (with a rubber cushion).

Wiring
While I received the motor, controller and display as a set, I quickly found out SiaEcosys does not provide a wiring harness with their sets. Thankfully I had already ordered some spare connectors and just had to pick up a crimping tool and bunch of wire. I was able to find some mostly english wiring diagrams and slowly managed to connect the controller unit with lock, twist throttle, display, brake lever and DC-DC converter for the lights. All the necessary connectors were supplied but none extra, so I recommend getting some more if you aren’t experienced or need to make any additional connections like lights.

I also added a DC-DC converter that drops the voltage down to 12V for the LED head- and tail lights. Both lights required custom mounts as the bike didn’t originally have any.

Motor
The QSMotor 260 hub motor was very easy to fit into the rear swing arm. Only modifications required were opening up the swingarm ends with a hand saw so the solid axle can be slid in place, and widening the swingarm by couple of millimeters using a small bottle jack.
What I didn’t realize beforehand was that the hub motor wheel is for tubeless use and has very tall lips. This resulted in me being unable to mount a tire on it myself, but thankfully the great people at Storm Motor were able to help and installed the tire for a very reasonable fee even though they had to do it manually as the hub motor didn’t fit on their mounting machines.
Other
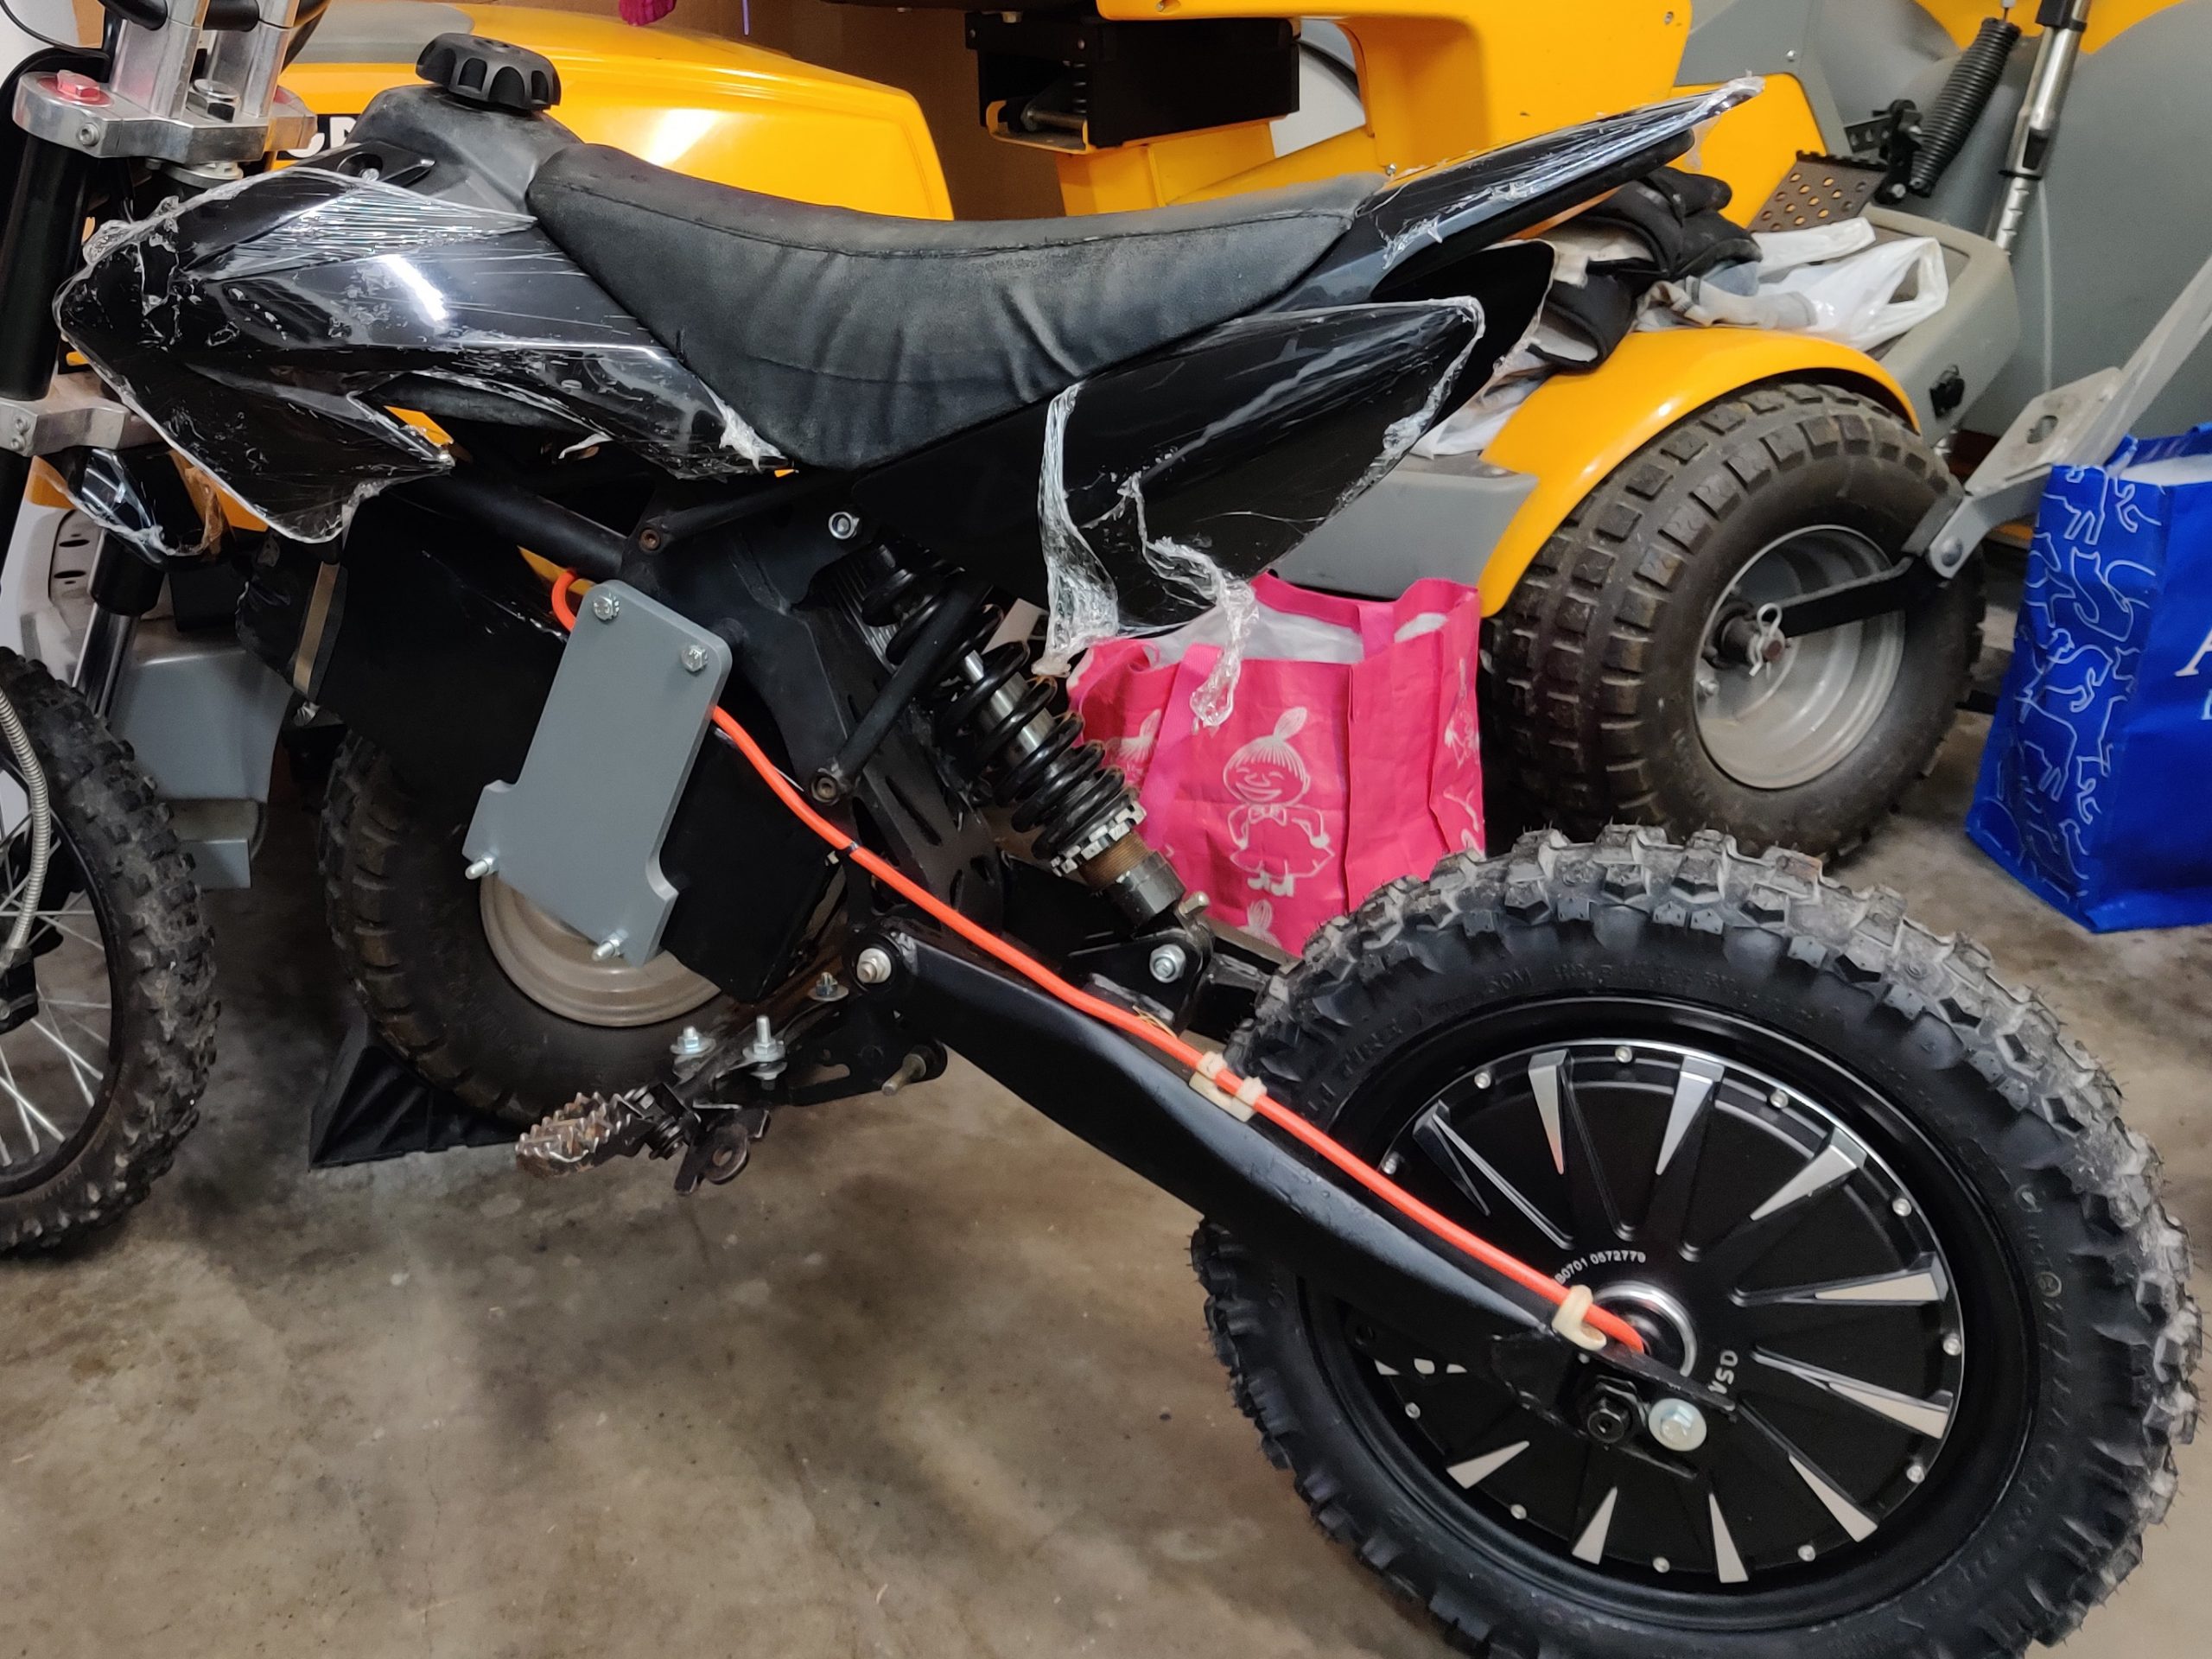
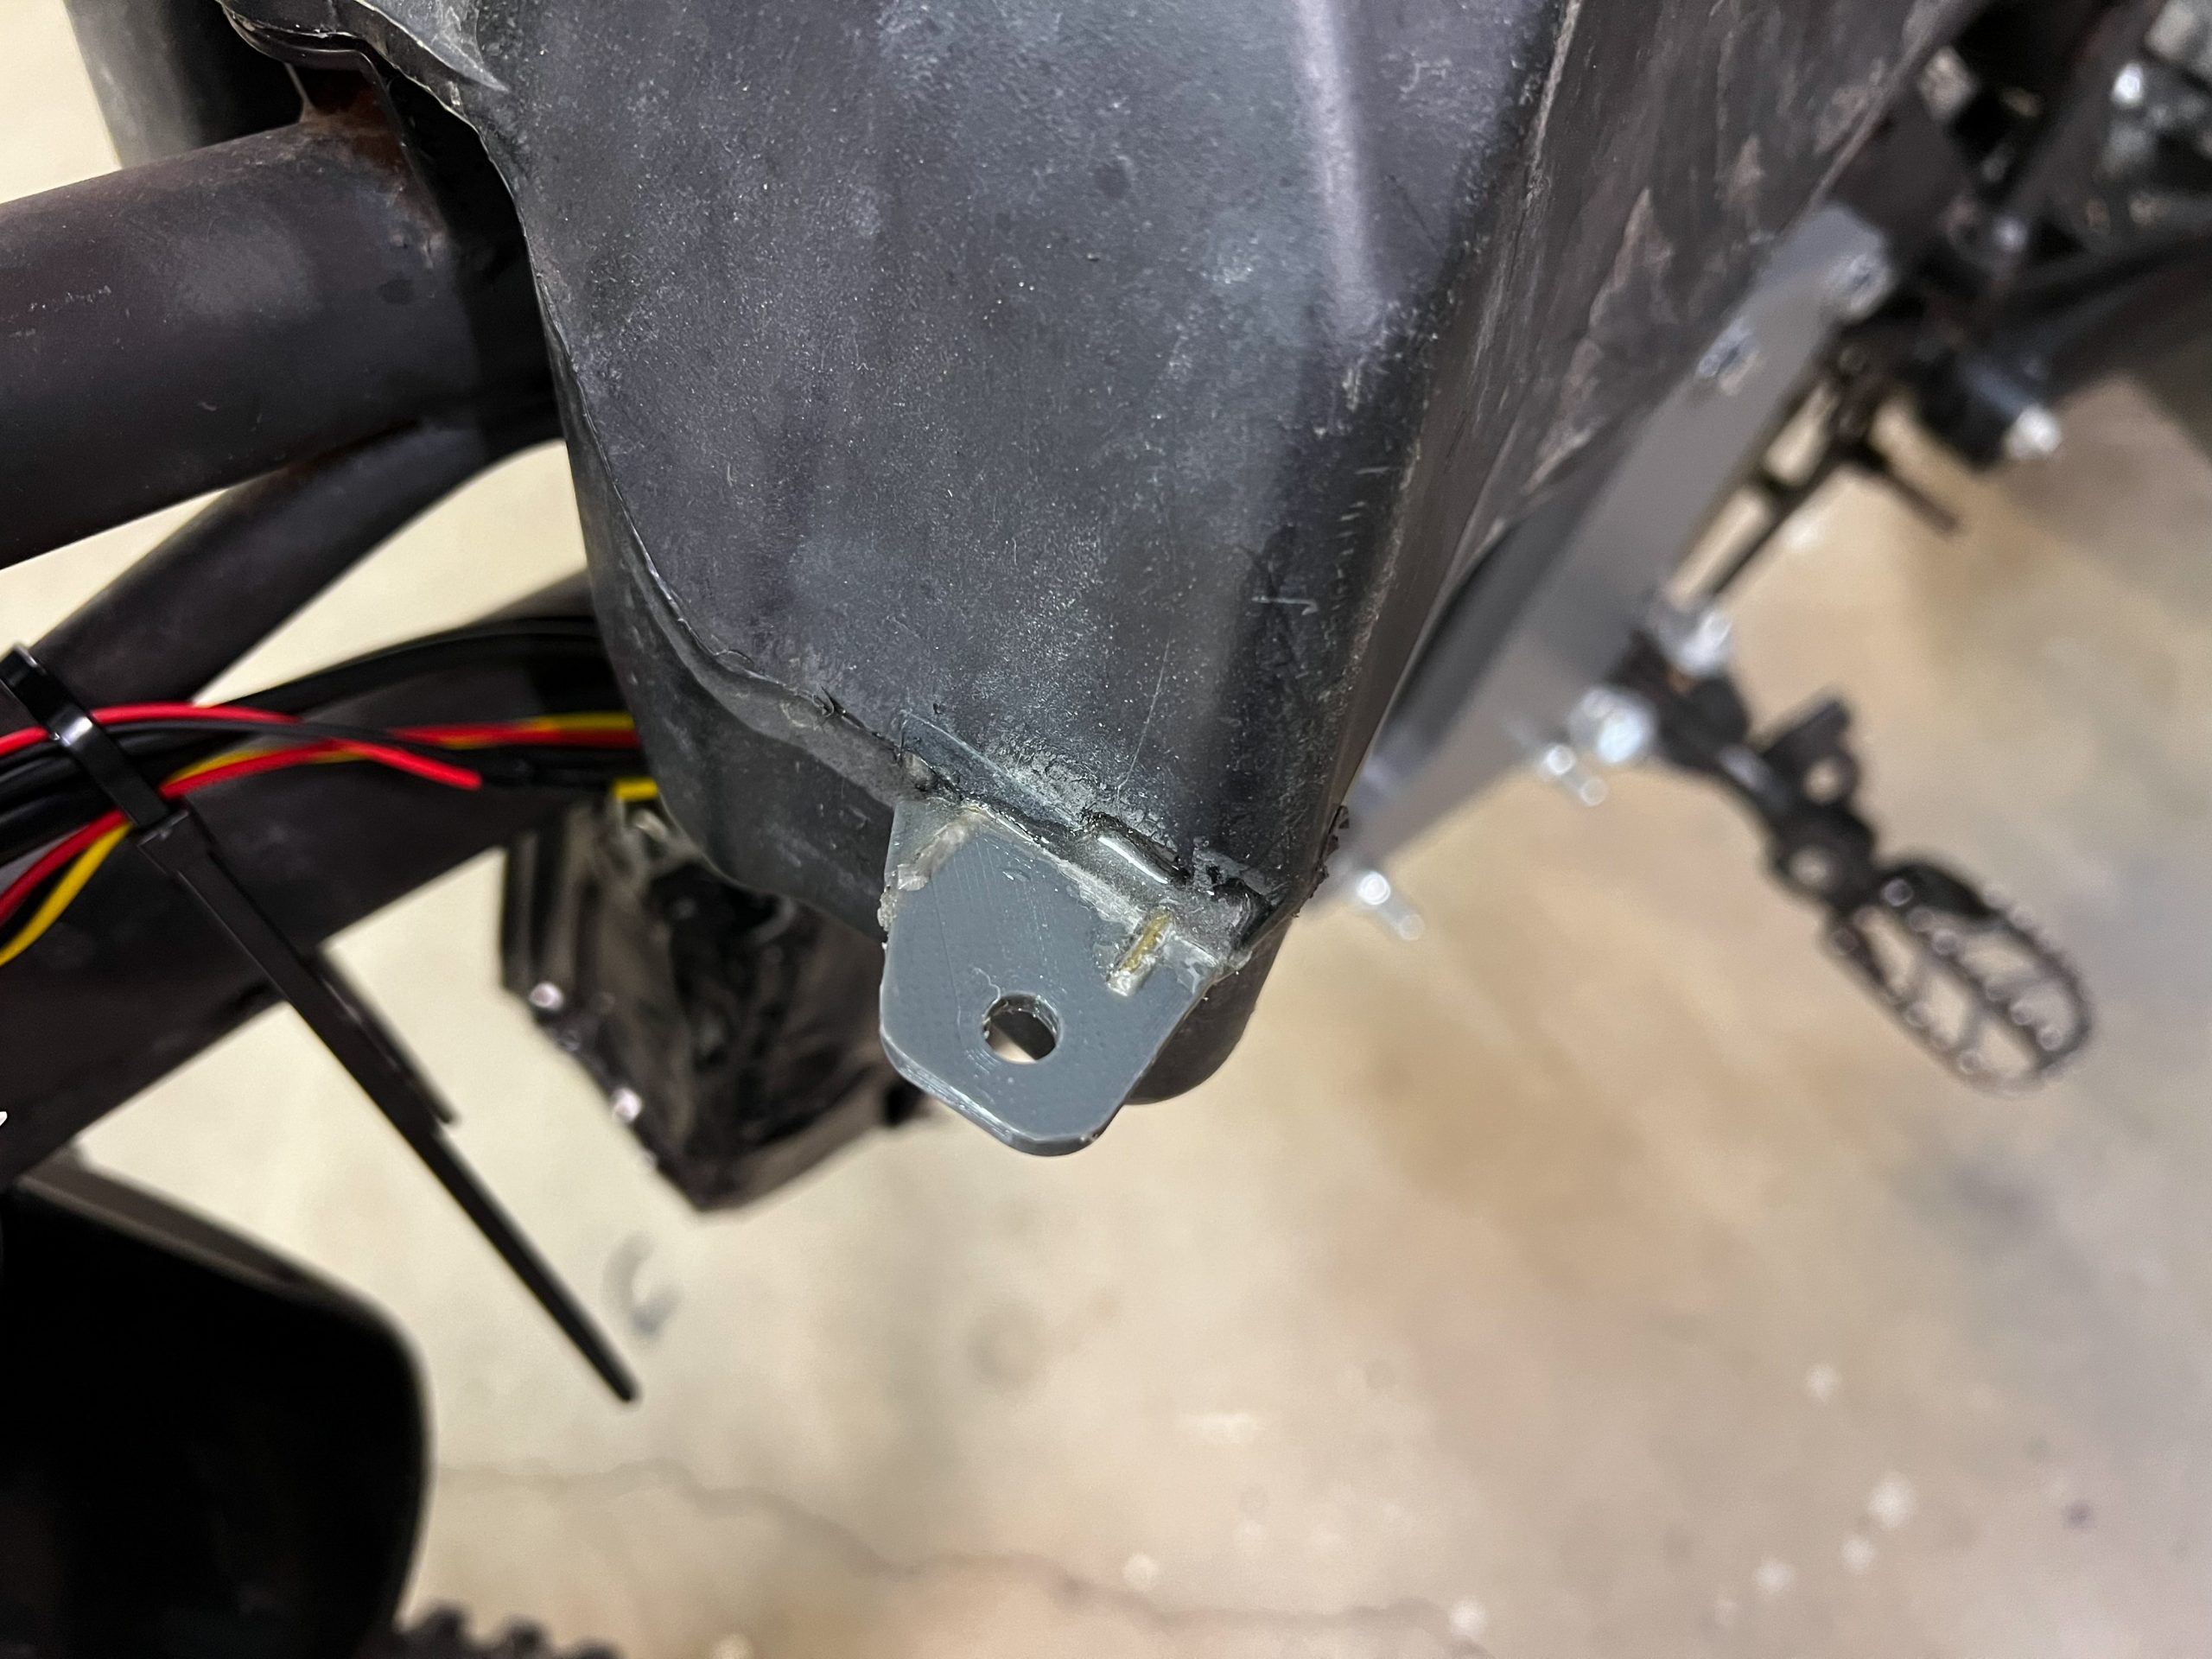
The bike also got new set of fairings and I sewed the torn seat cover back together. One fairing mount on the fuel tank had torn off and I replaced it with a 3D-printed replacement, some steel rods and epoxy.
In the end, all following parts were custom designed and 3D-printed:
- Replacement fairing mount
- Battery mount
- Charge port mount and cover
- Tail light mount
- Head light mount
- Display holder
Finishing
Software
Thanks to very helpful forum thread on Endless Sphere I was able to configure the Votol controller using a laptop and the controller’s USB interface. Through the software I set the top speed to 25 km/h and enabled high-brake meaning the left-hand brake lever acts as rear brake by activating regenerative braking of the motor. When unlimited, the bike reached 45 km/h.
Interestingly enough, tire size for speedometer calibration is set through the display itself using the buttons underneath and not via USB connection.
I have uploaded all the wiring diagrams, manuals and software to Github since they seem to be somewhat difficult to find at times. You may download all the resources here: https://github.com/Kaljami/Votol-EM30s-controller
As a side note, the Votol controller I have seems to have a bug that forces the display to show the gear always as “N” when speed limiter is programmed to be active. As far I’m aware, there doesn’t seem to be a firmware update available for this at the moment.

Last thoughts
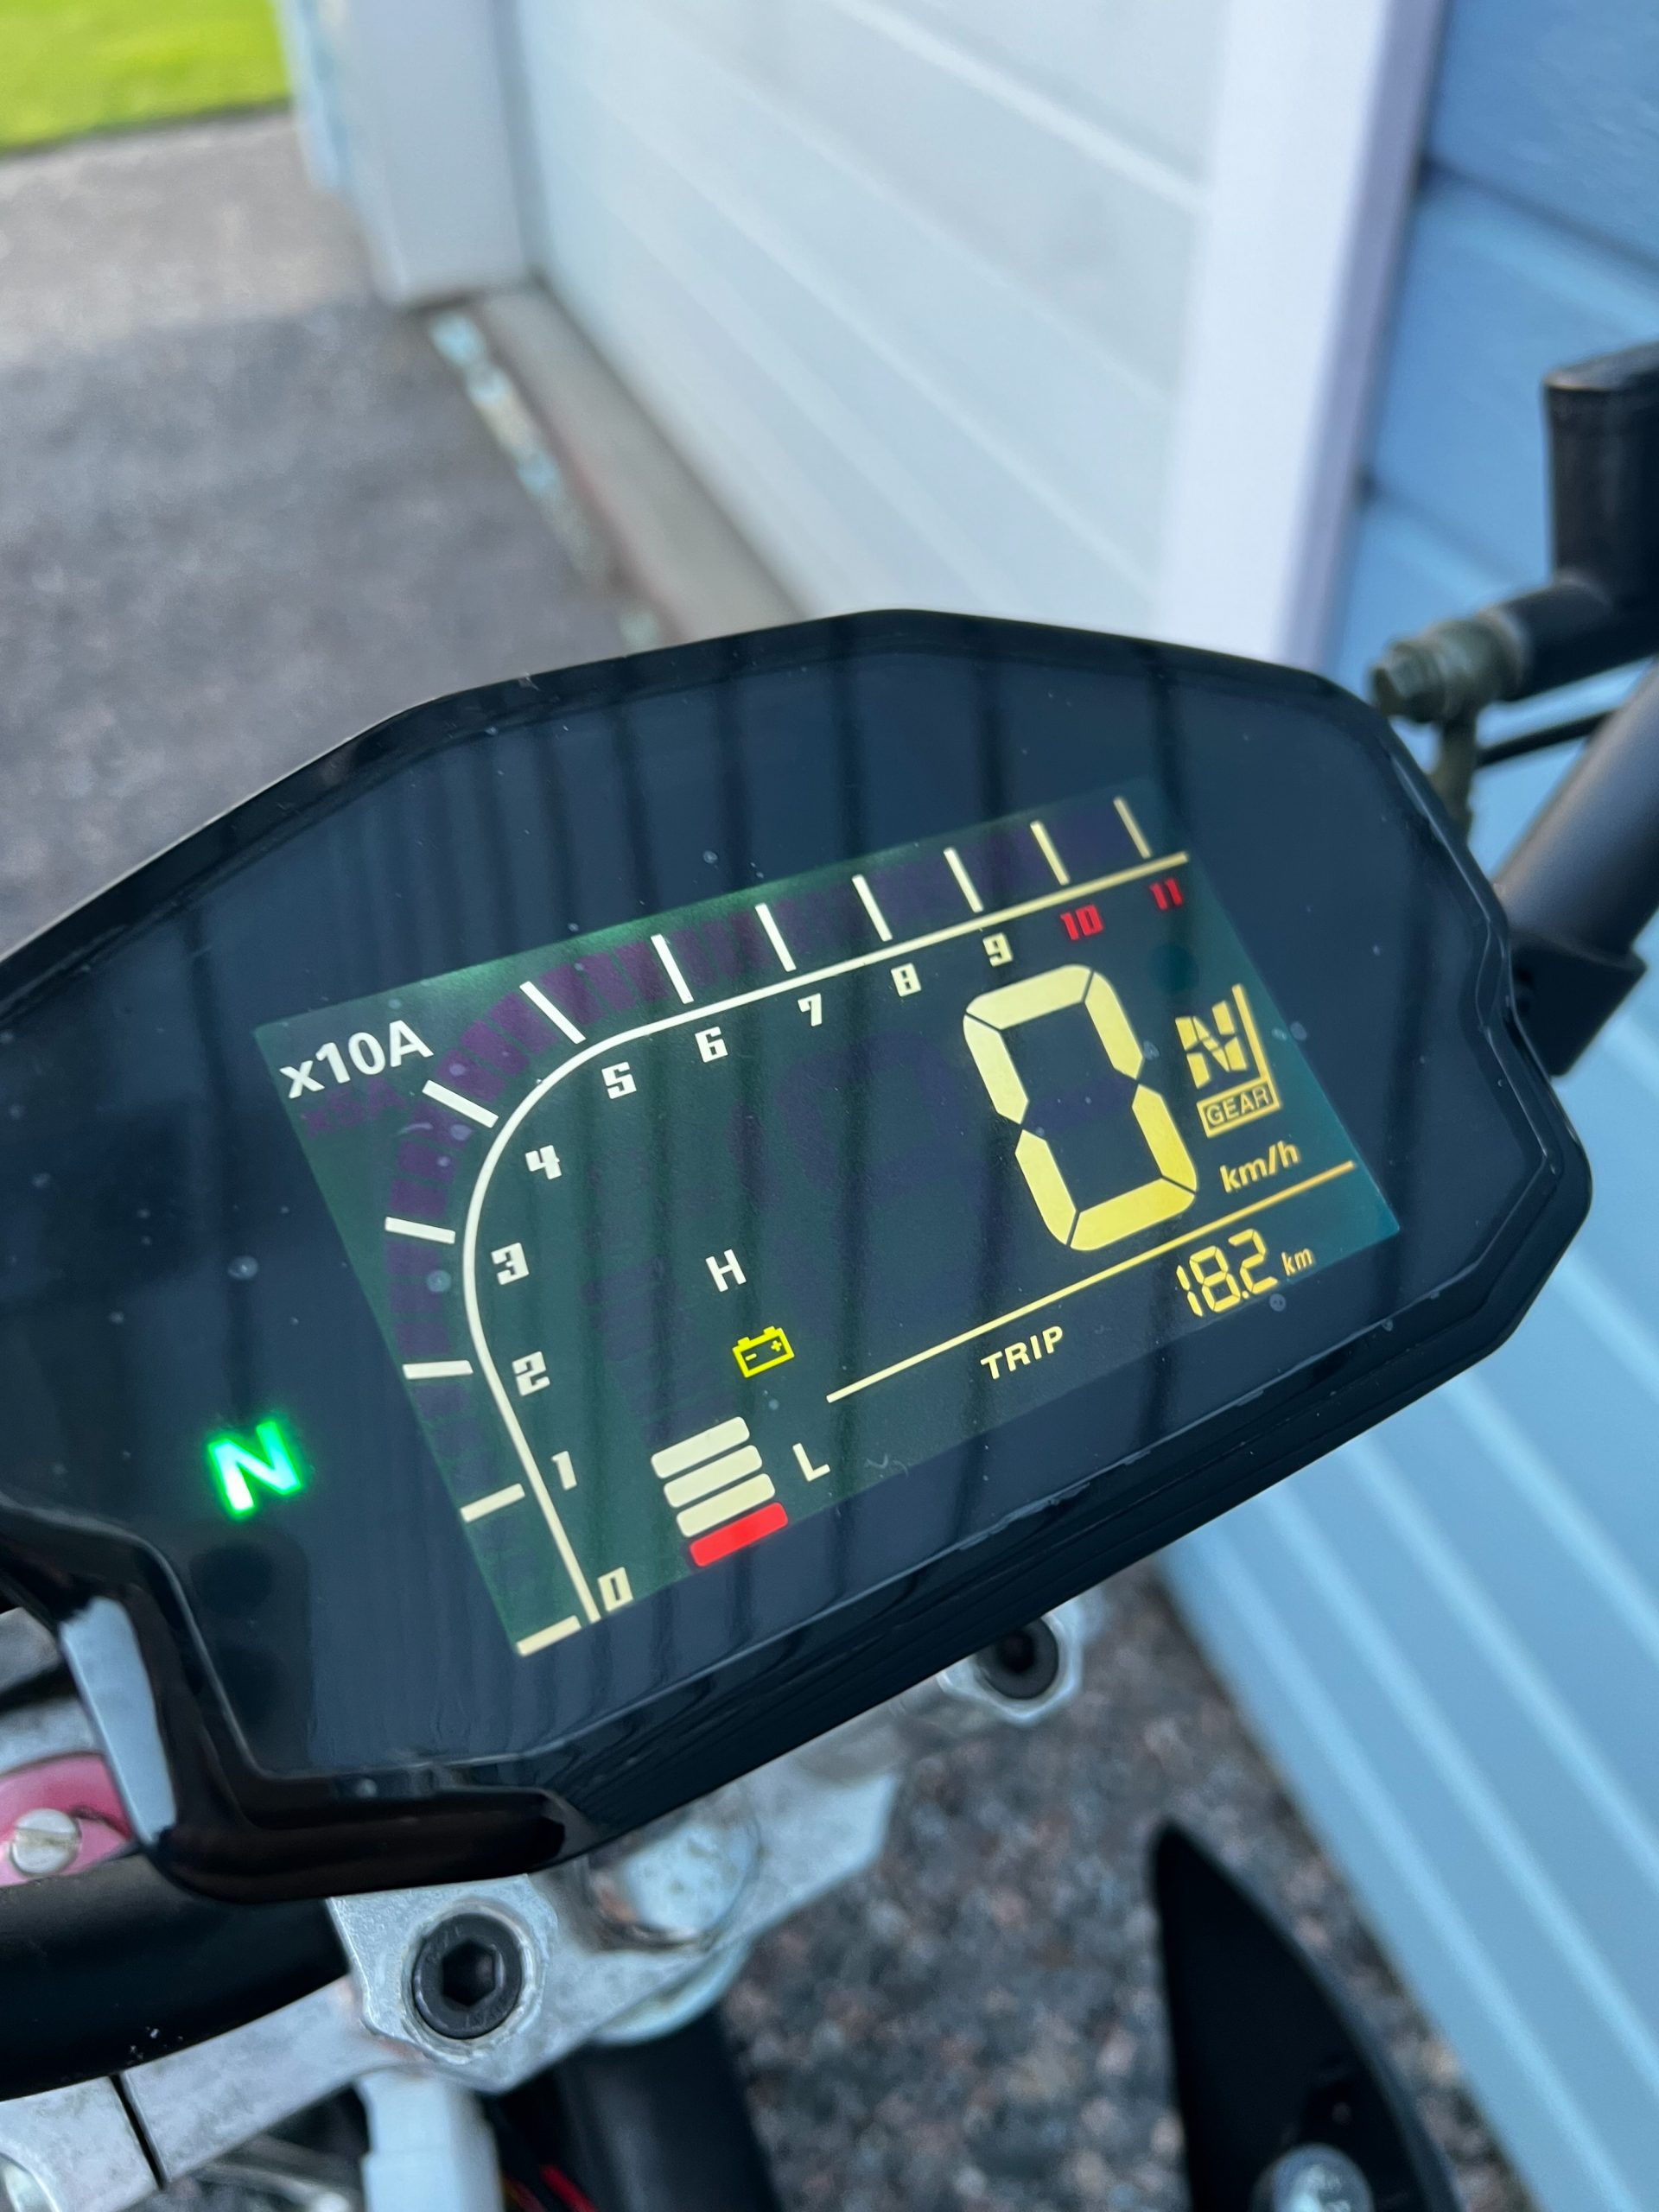
On my first proper test ride I started with 90% battery and ended up with 40% after 18 km mix of on- and off-road which s eems to be in line with the expected range. Overall I’m very satisfied with the performance and even surprised by the amount of torque, being able to haul a heavy-set adult swiftly up even the steepest hills I tried.
Final cost of the bike not including tools or labour was a bit under 1200 € after taking into account savings from selling any unneeded parts. Closest commercial equivalent seems to be KTM SX-E 5 with 2 kW drivetrain, similar range and 5190 € price tag. While the KTM will have way higher quality parts, in my opinion the DIY option is the better deal.